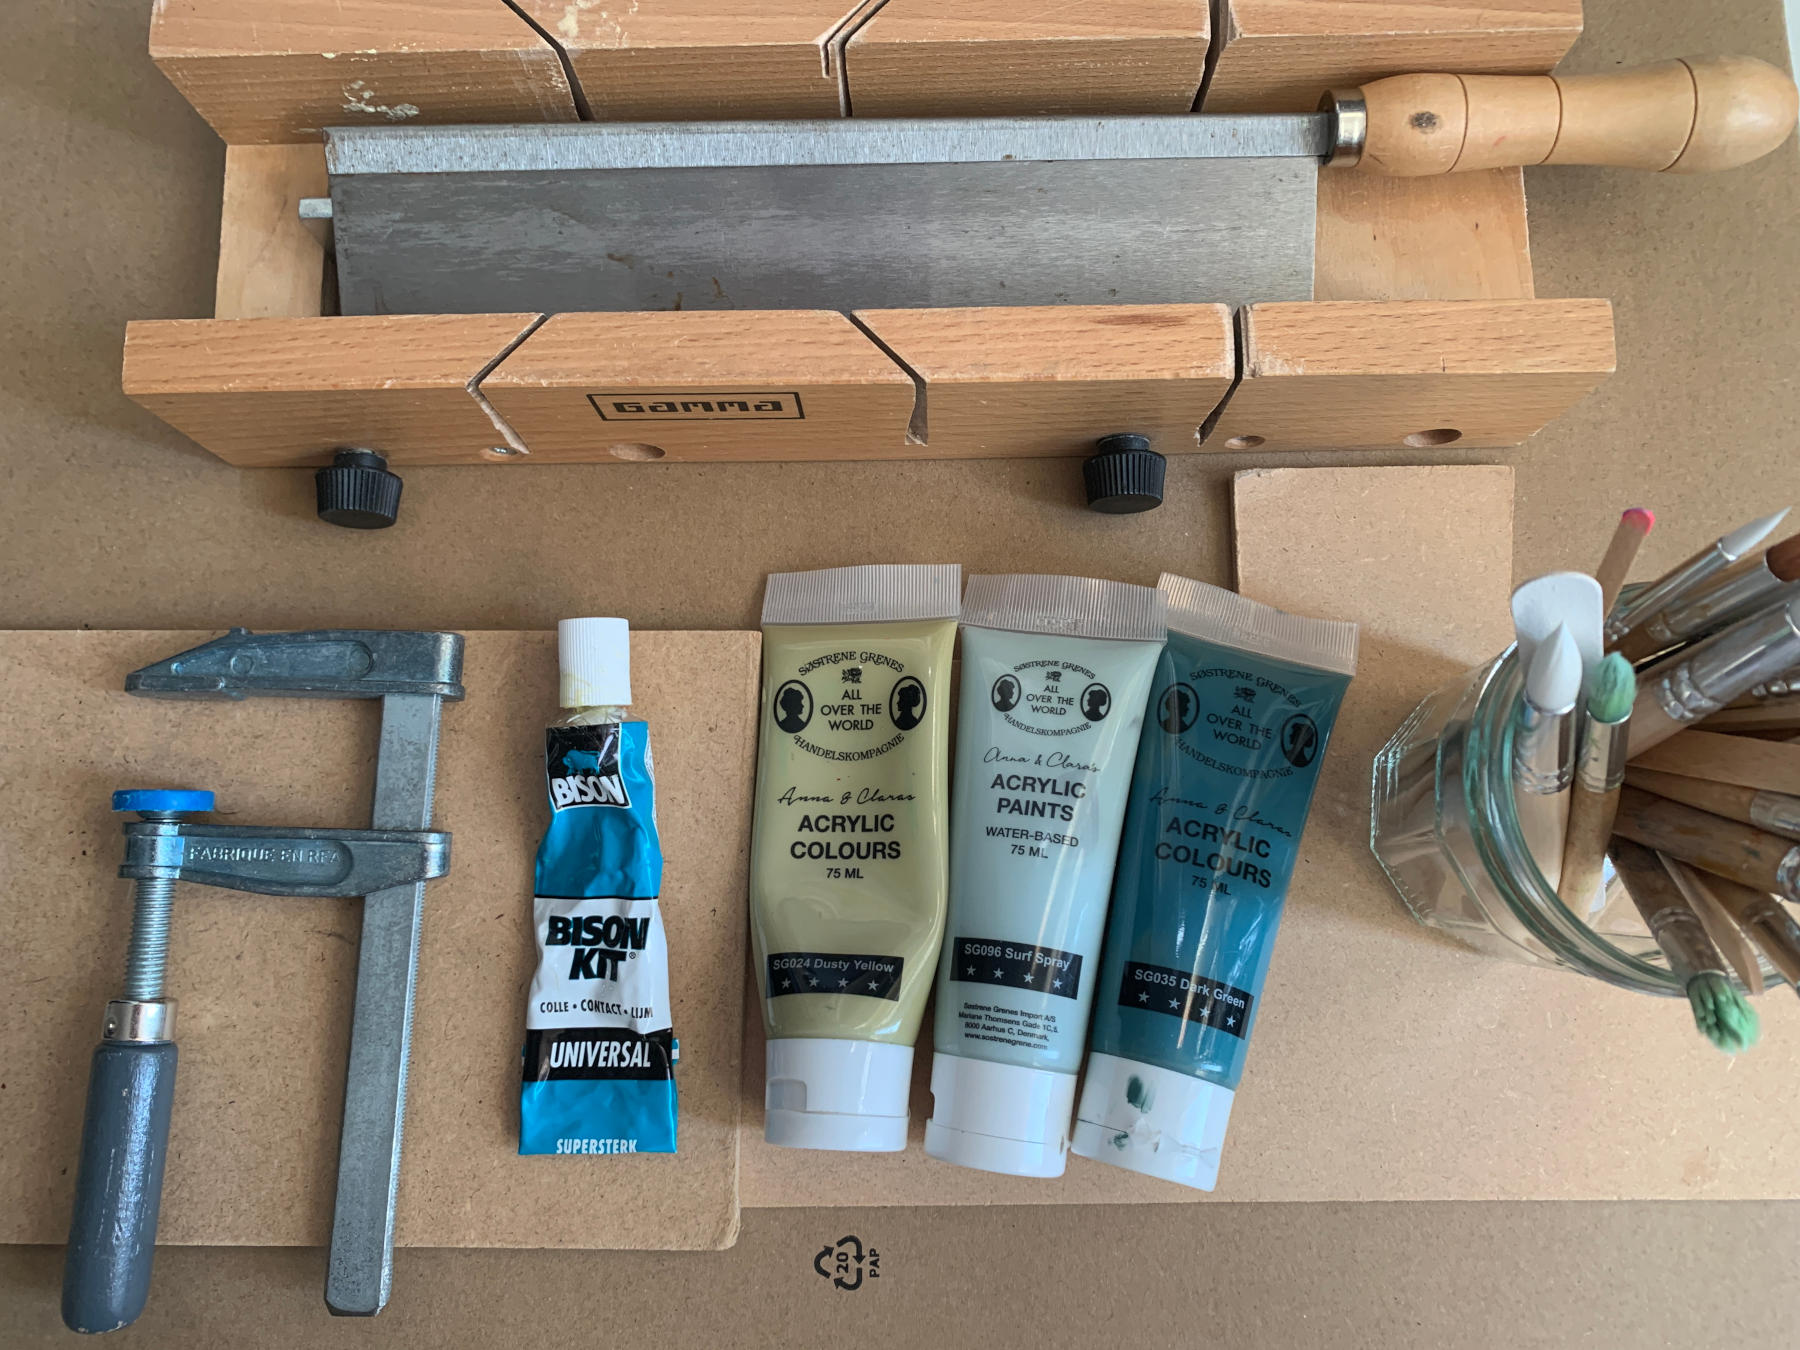
What do you need?
piece chipboard (leftovers)
a stick
pencil and ruler
a saw and miter box
sandpaper
Bison contact glue
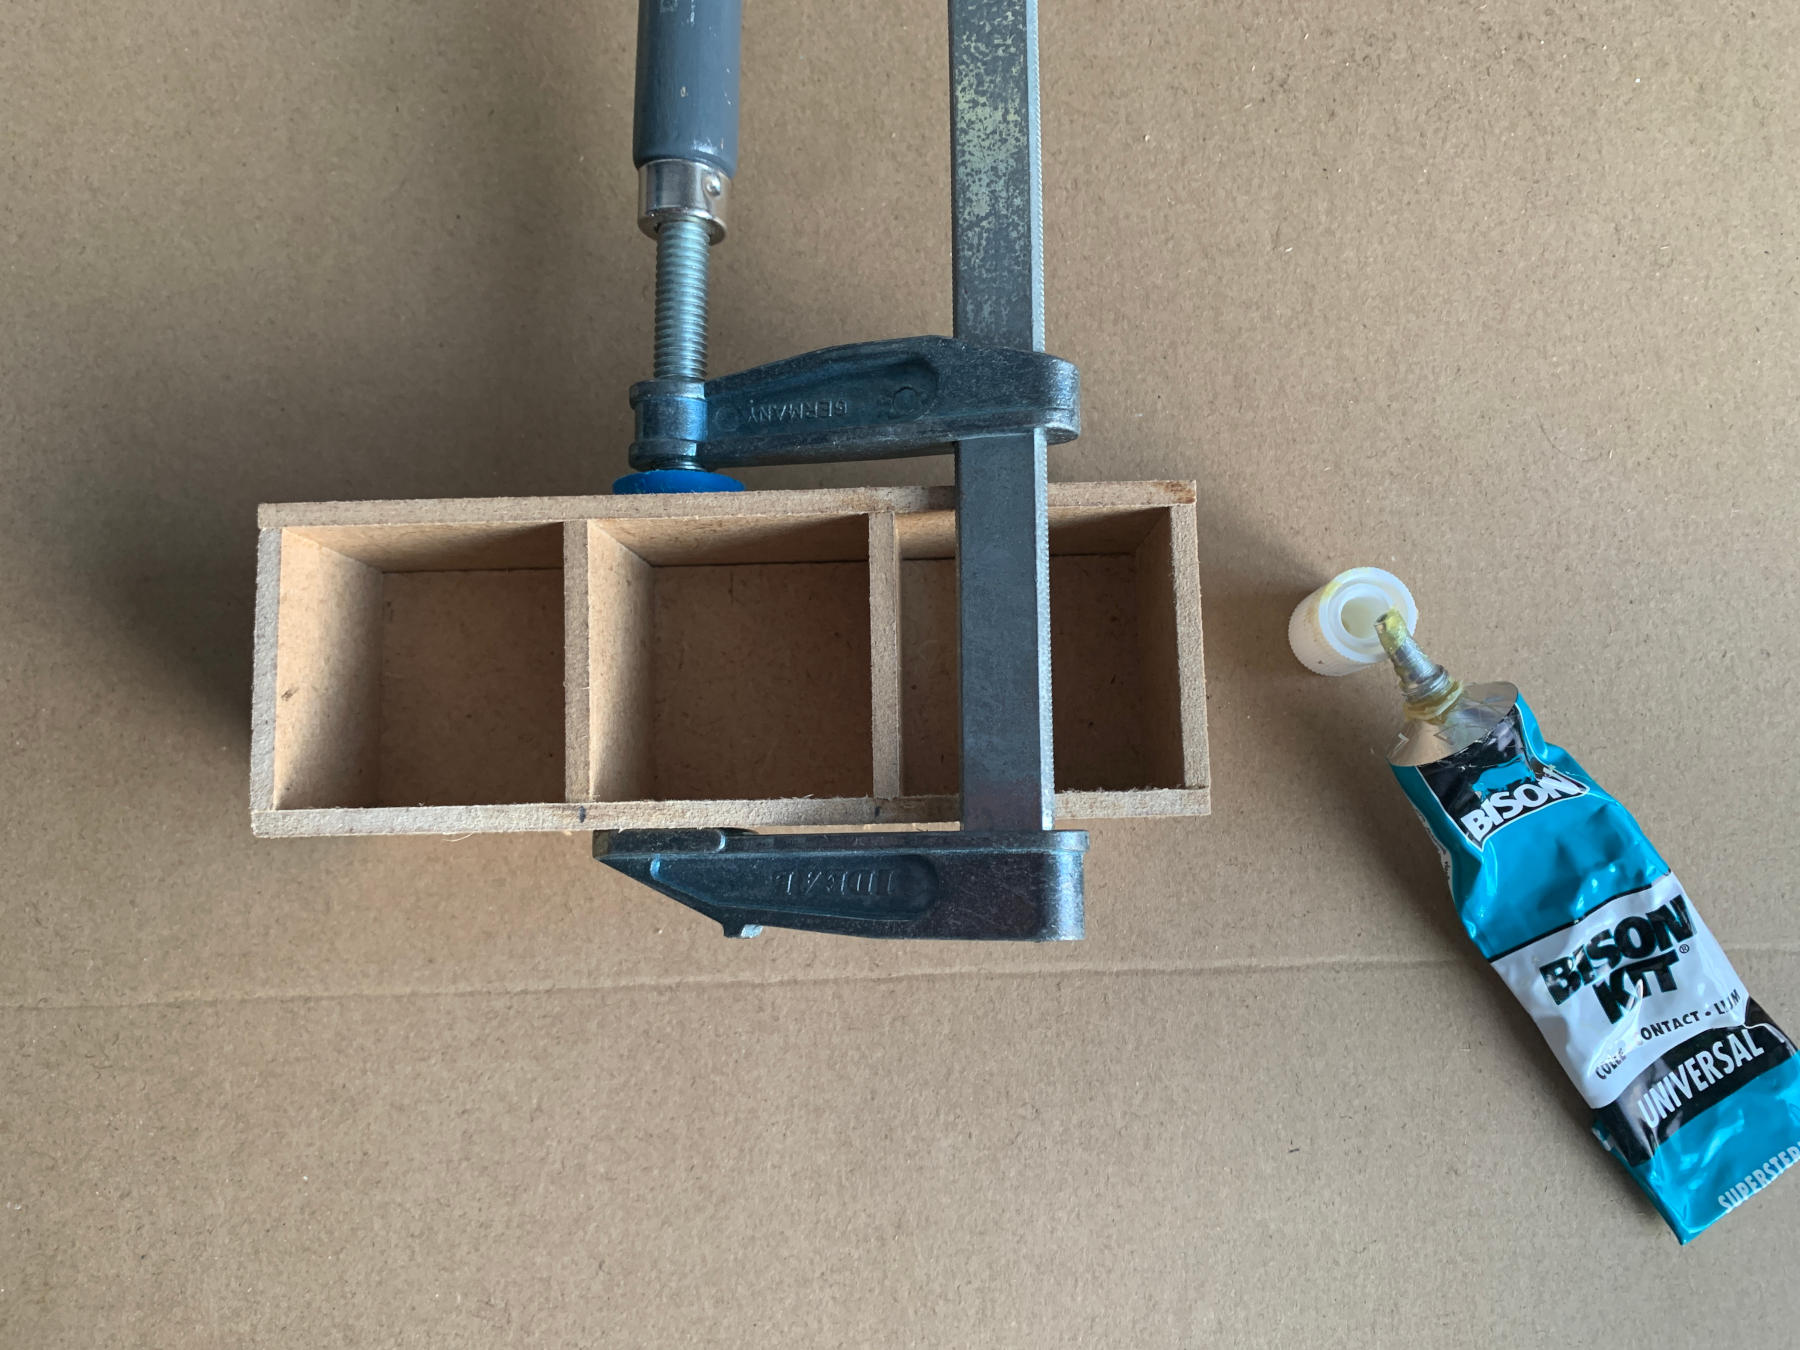
glue clamps
various colours paint
paint brushes
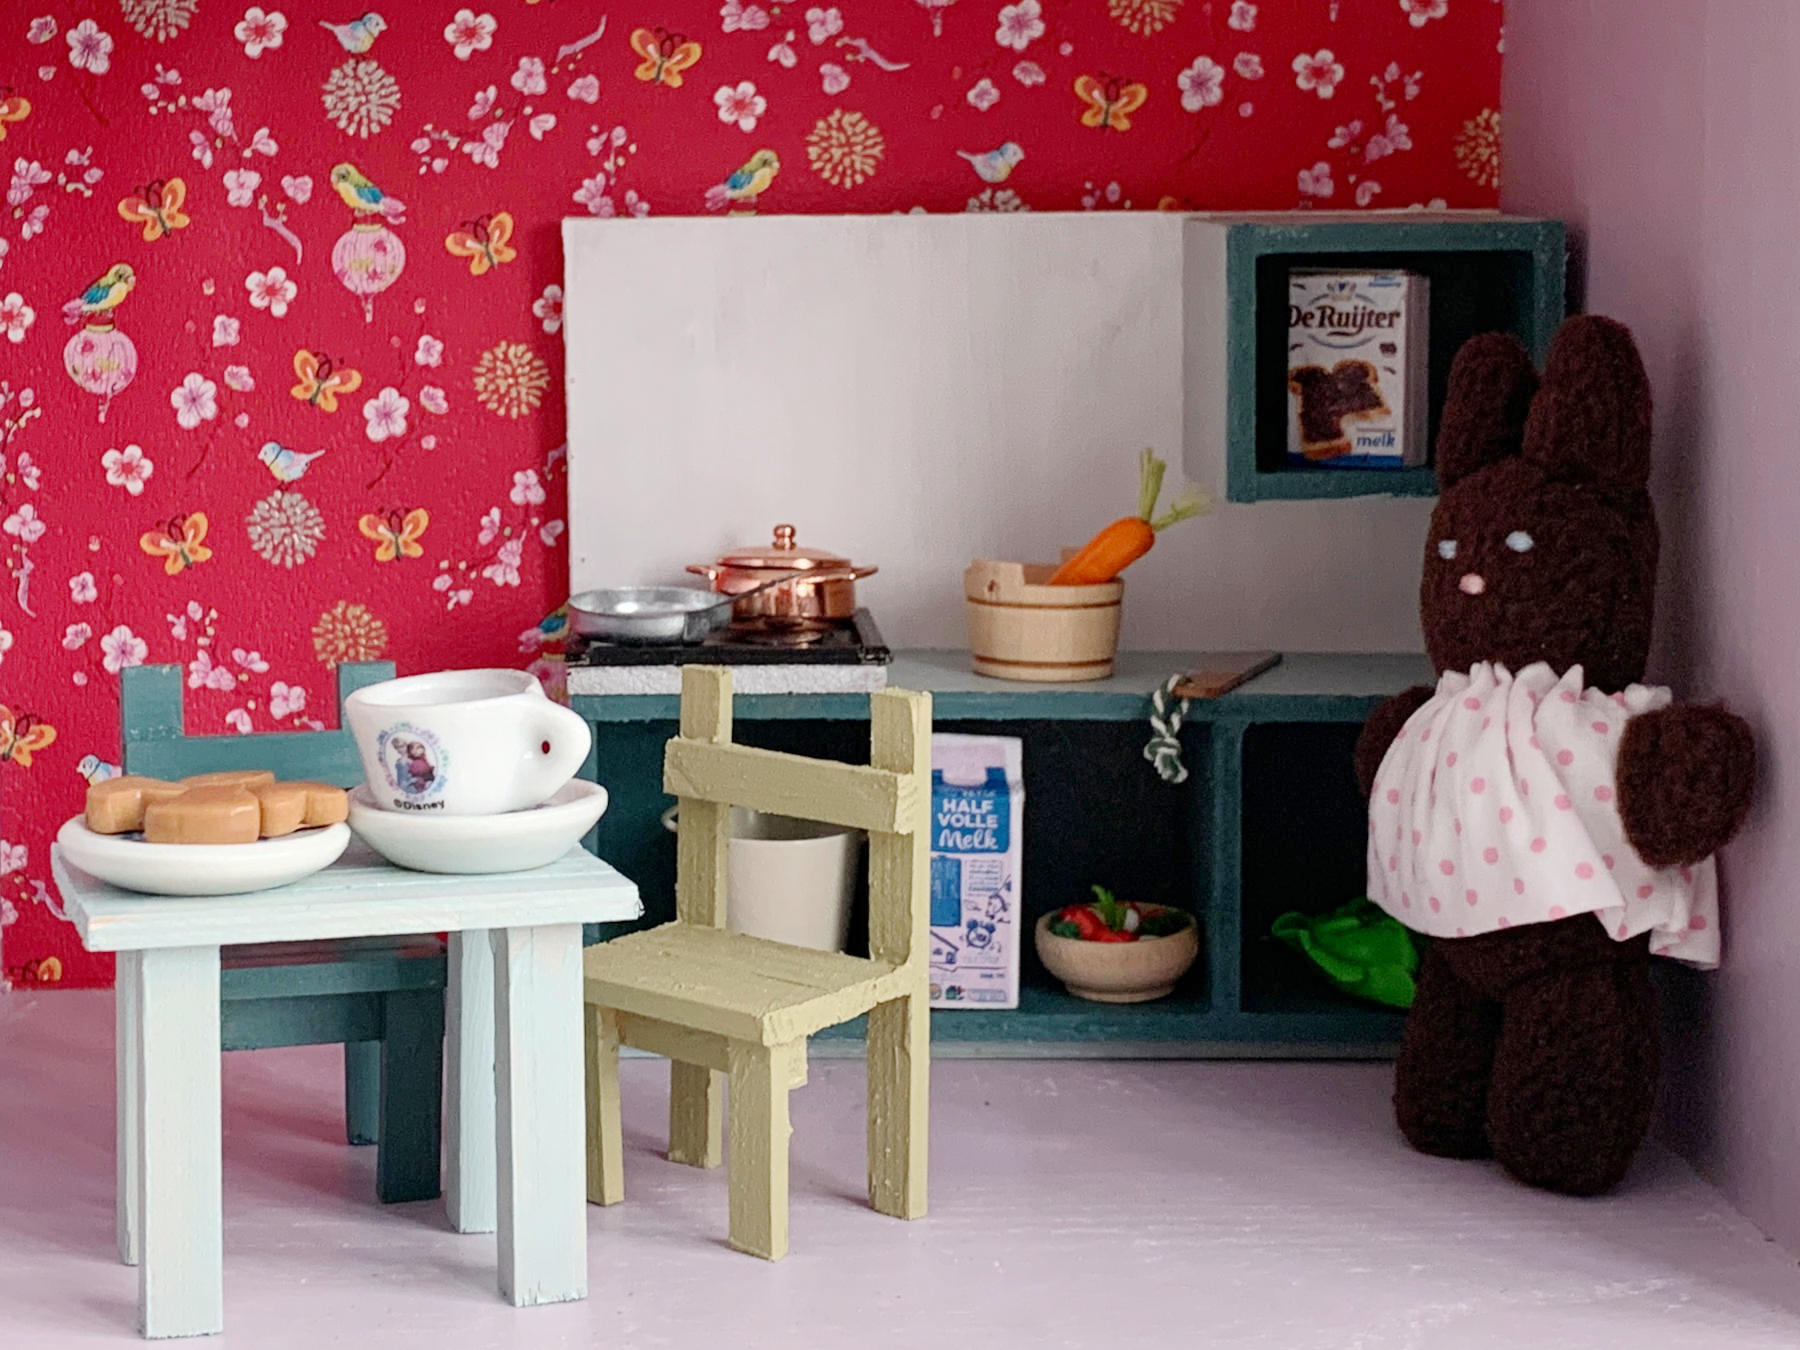
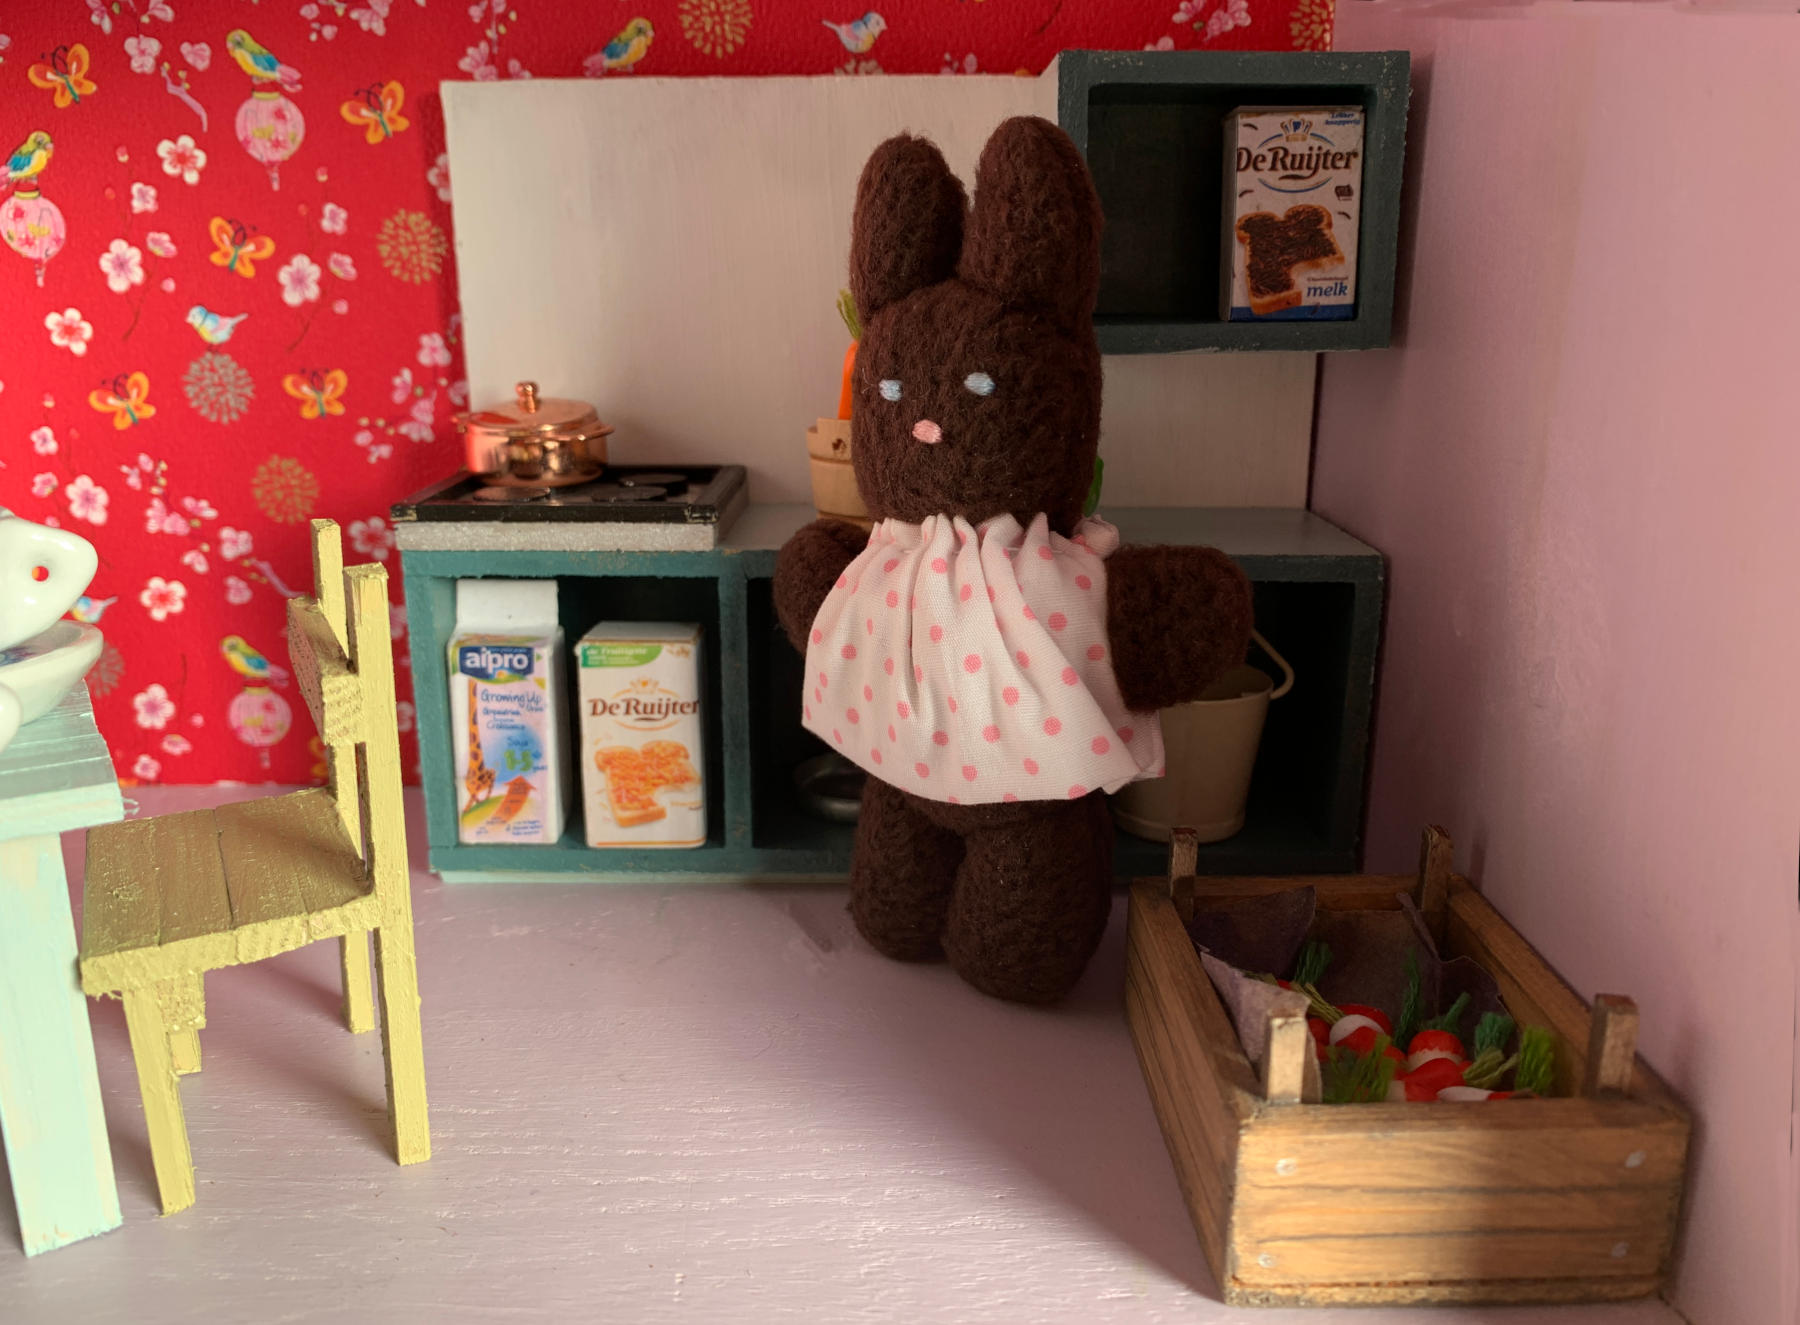
Today we're making a kitchen unit for the dollhouse so our bunnies can make their meals. We sawed the unit from leftover chipboard and then glued it together. Remember to let the glue dry completely before you start painting, so be patient and let it dry overnight!
We paint the kitchen unit in the retro colours from Sostrene Grene: Surf Spray on the outside and Dark Green on the inside. We like a nice retro combination, but you can choose your own colours. You can download and print the PDF of the kitchen unit, if it is handy for you..
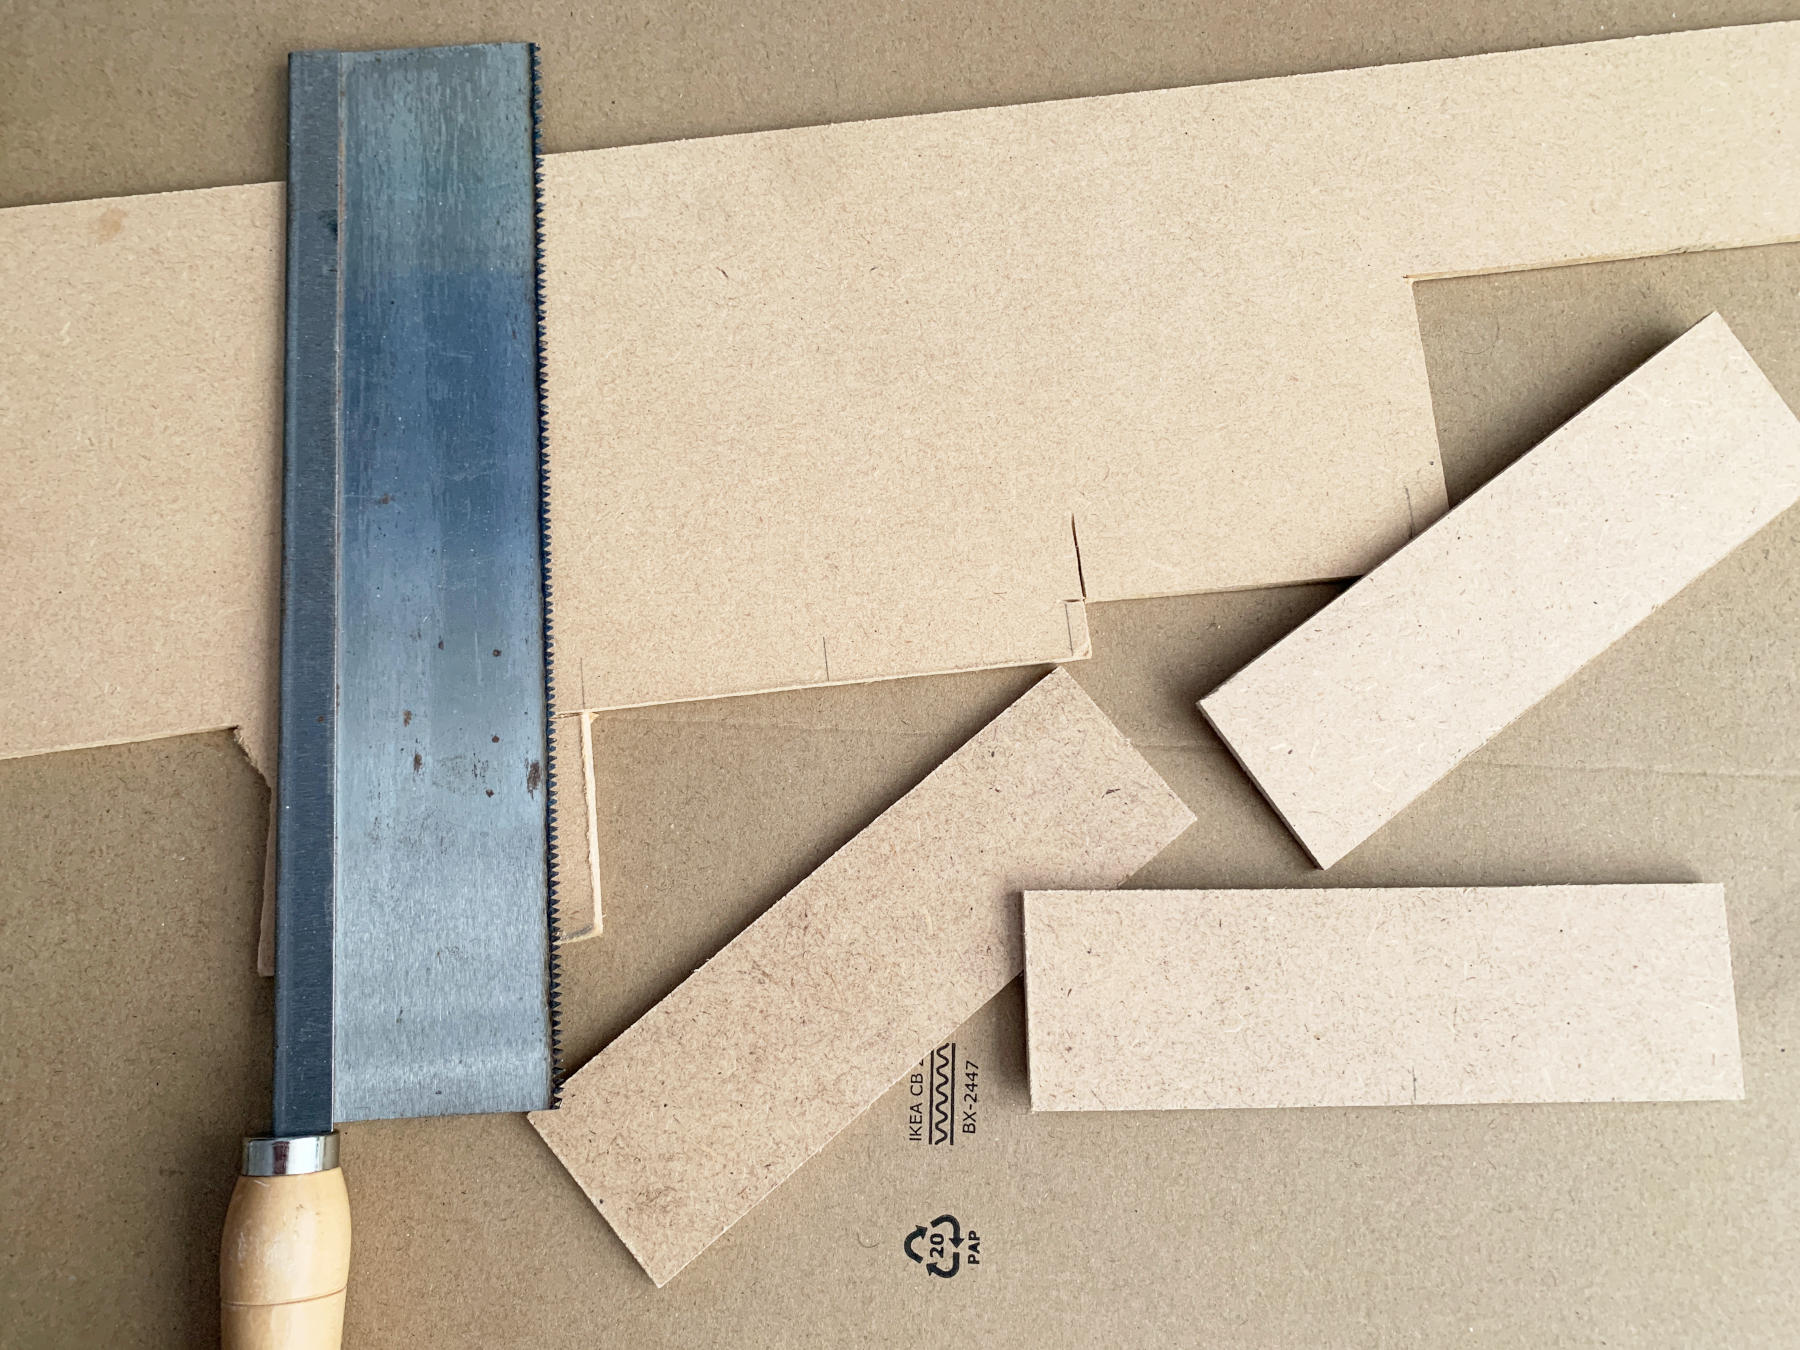

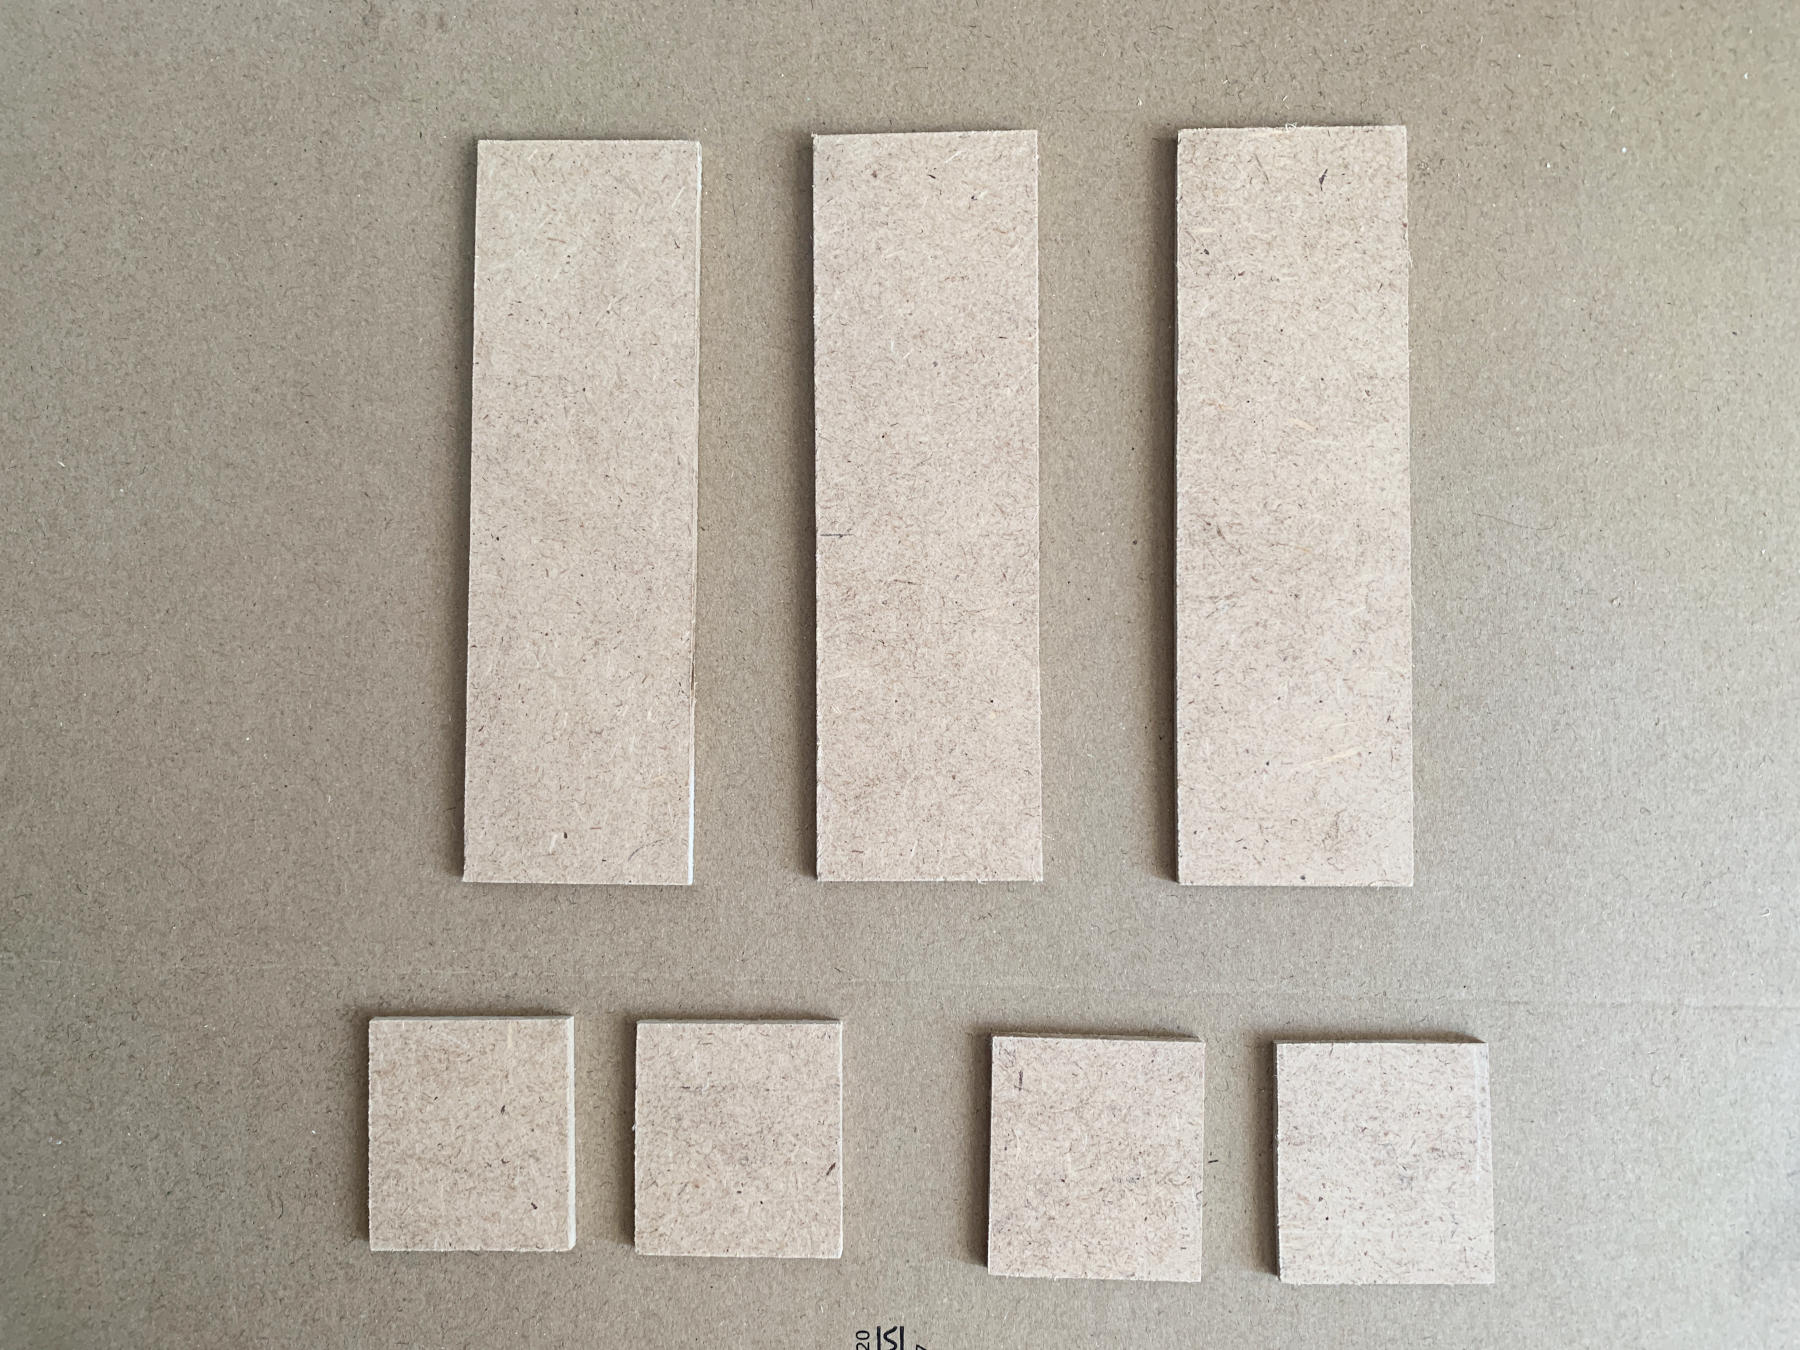
Saw off 3 pieces of chipboard, of 15x4.5 cm.
Saw 4 pieces of chipboard of 4.5x4cm.
Sand all 7 pieces of chipboard neatly smooth.
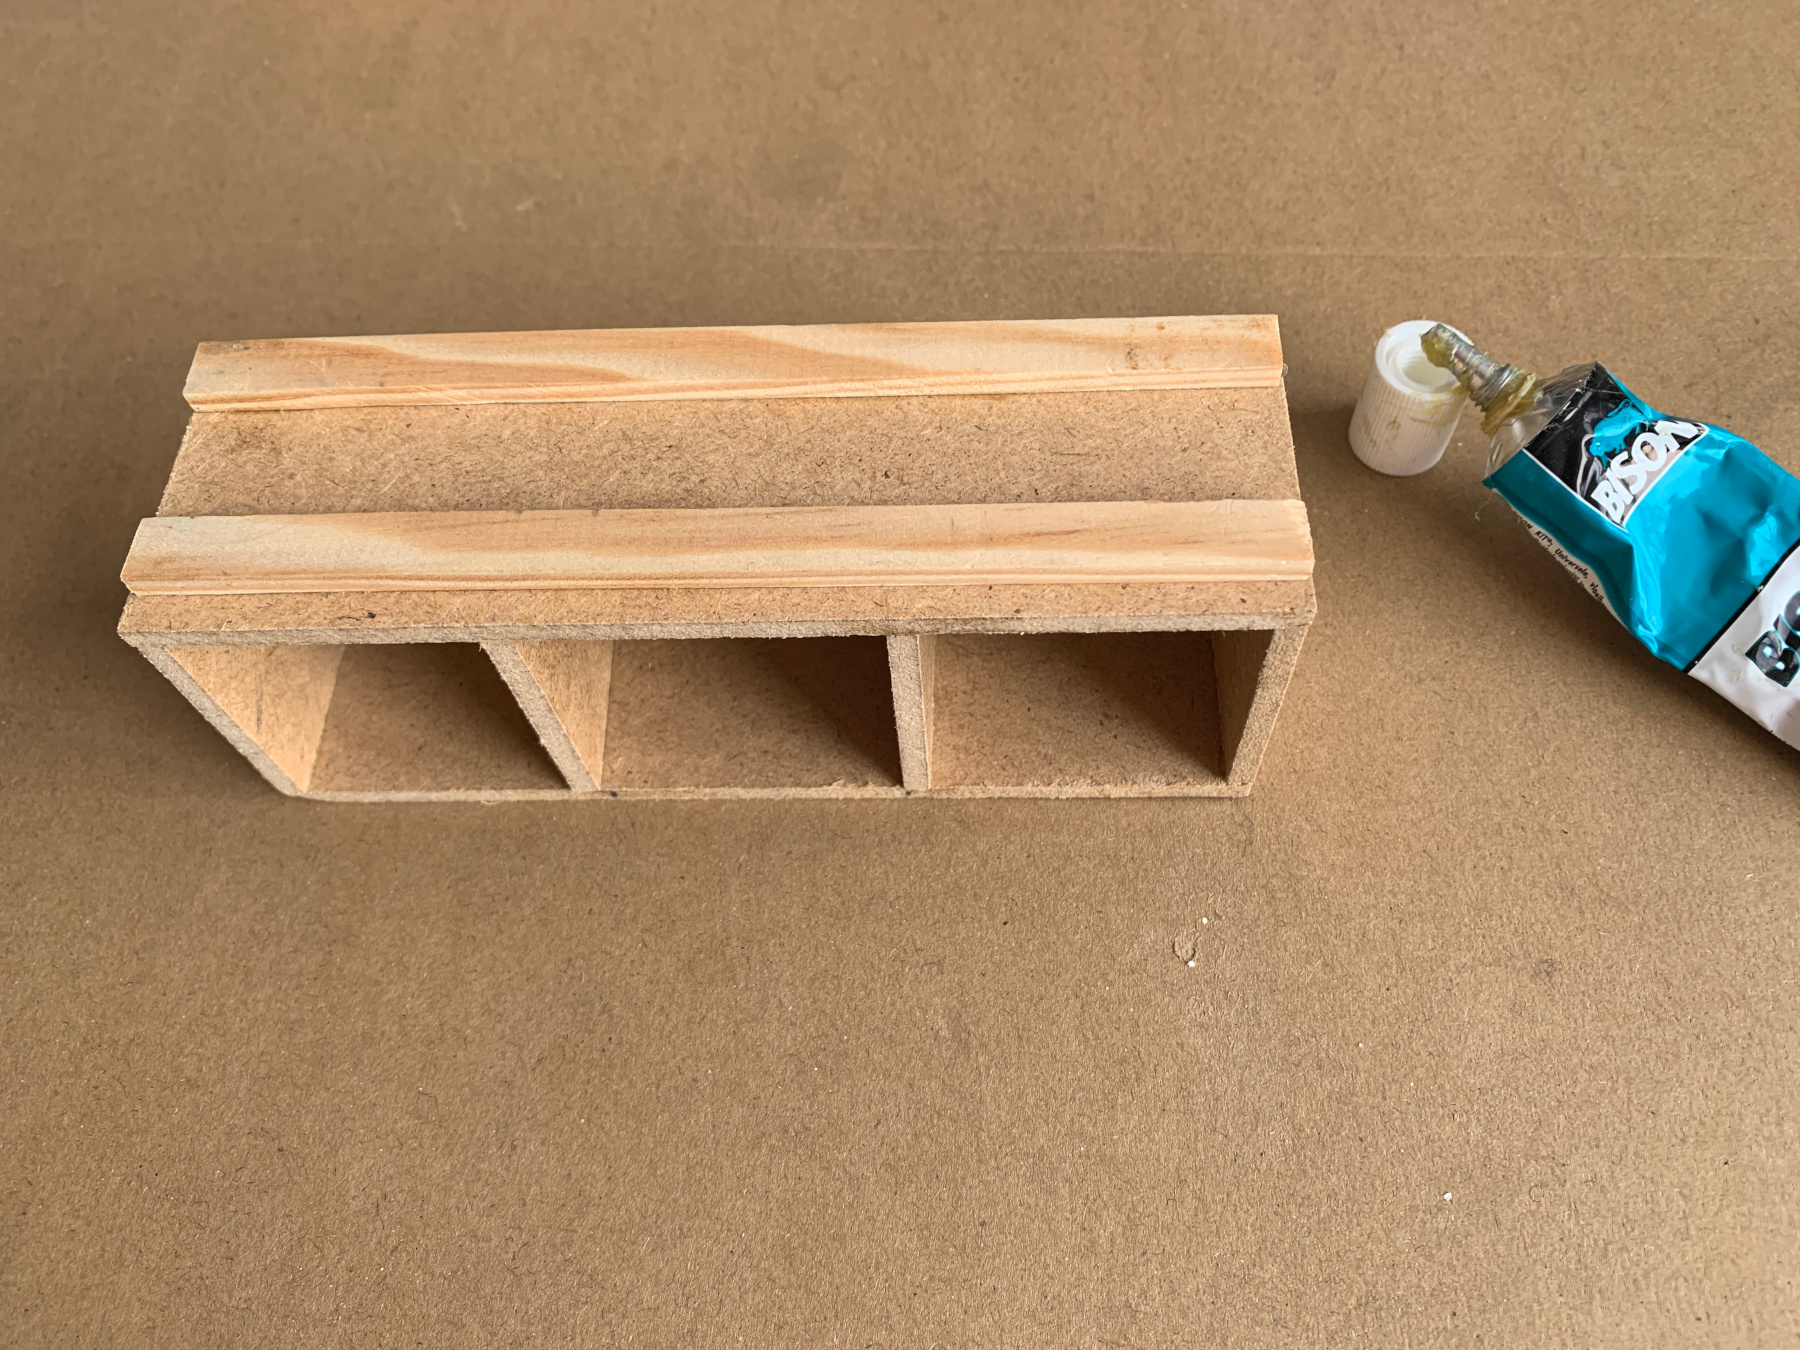
Stick top, bottom and both sides together and let the glue dry.
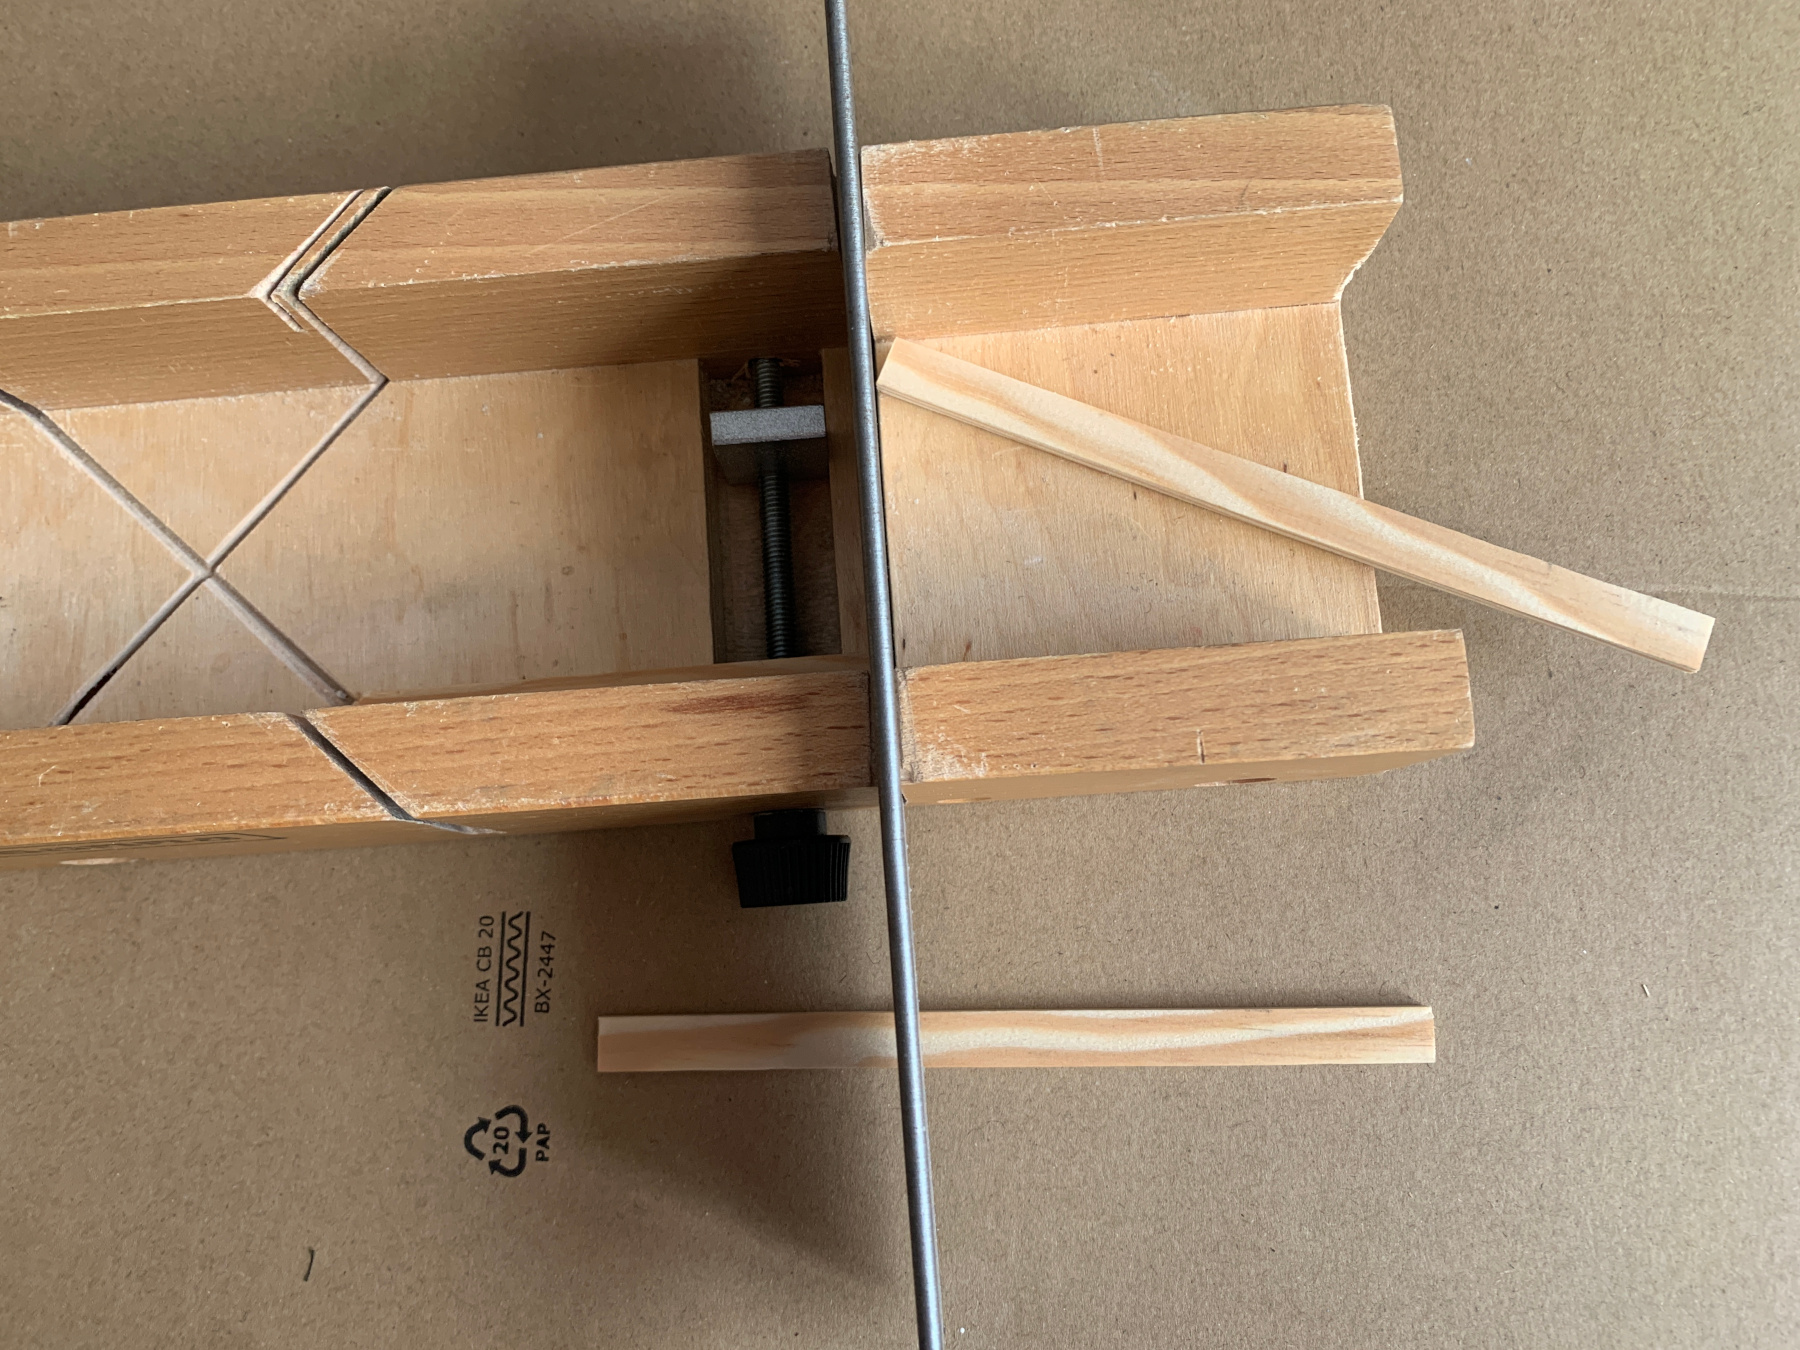

Saw off 2 narrow slats, of 15x1cm, sand the sawn off sides smooth.
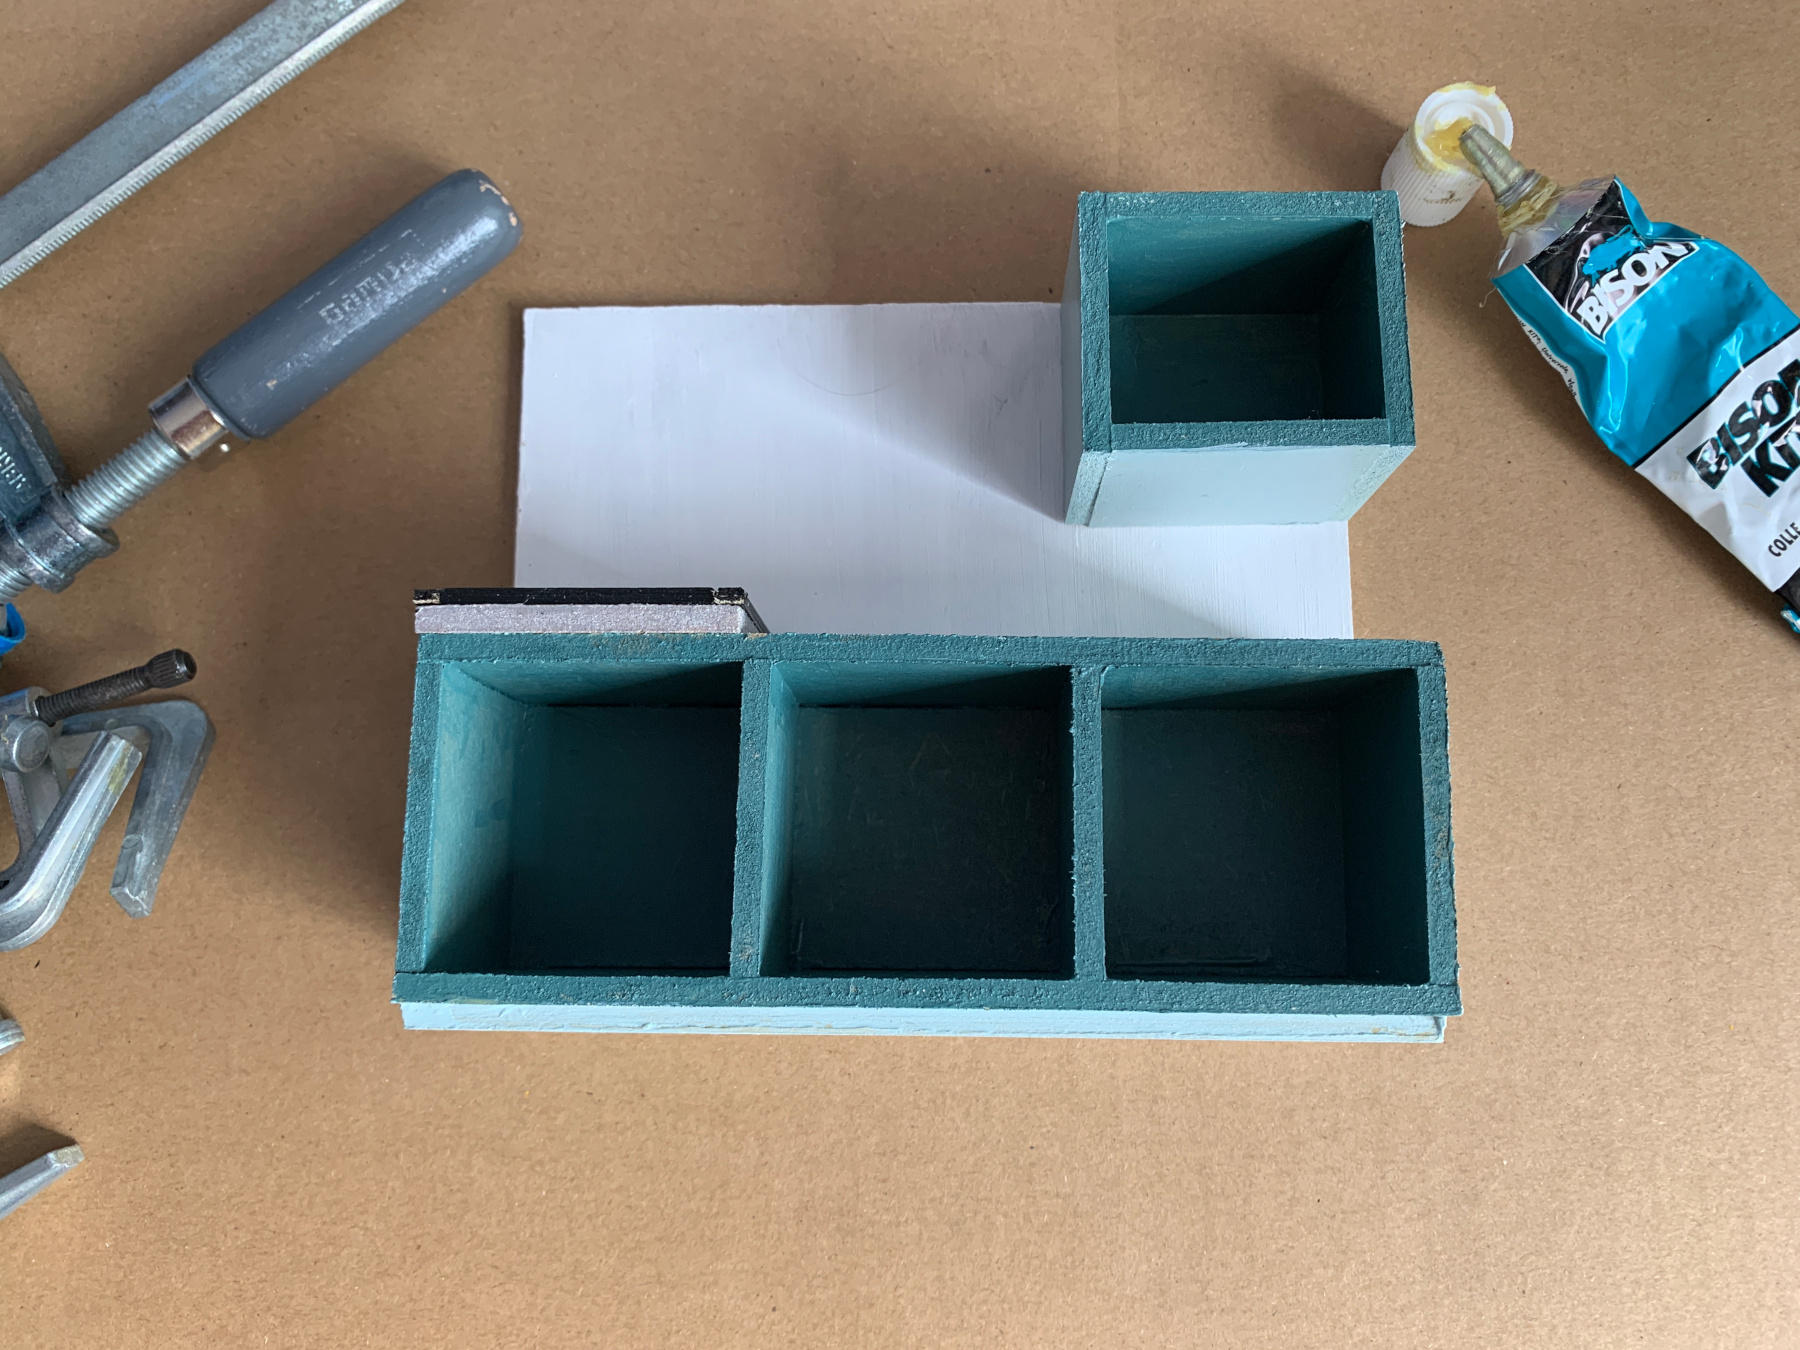
Glue the 2 walls into the kitchen unit, stick the slats underneath.
Place two glue clamps on your kitchen unit and let the glue dry overnight.
Make a small top cuboard in the same way
Day 2 Paint your Kitchen Unit
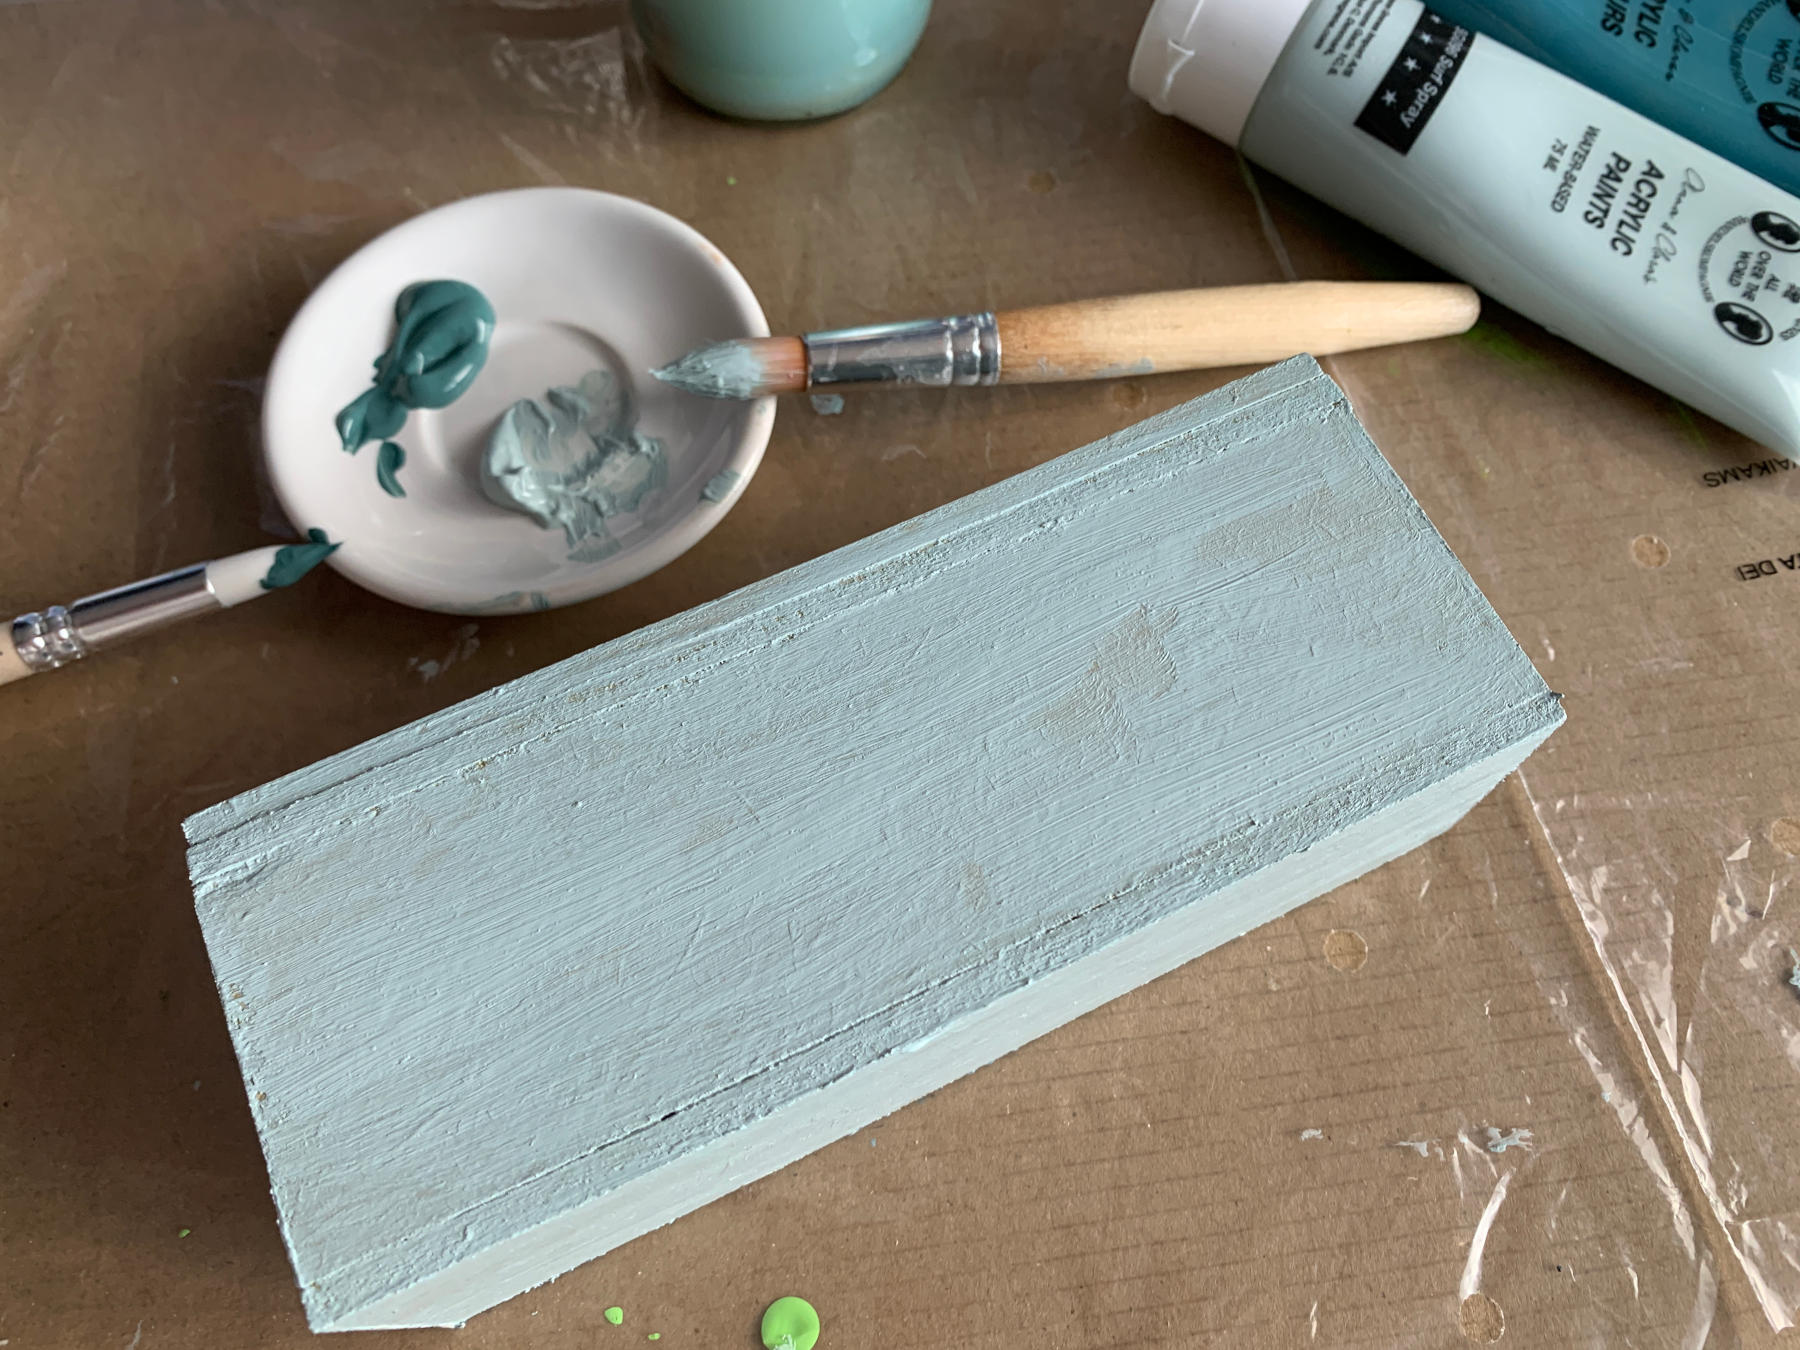

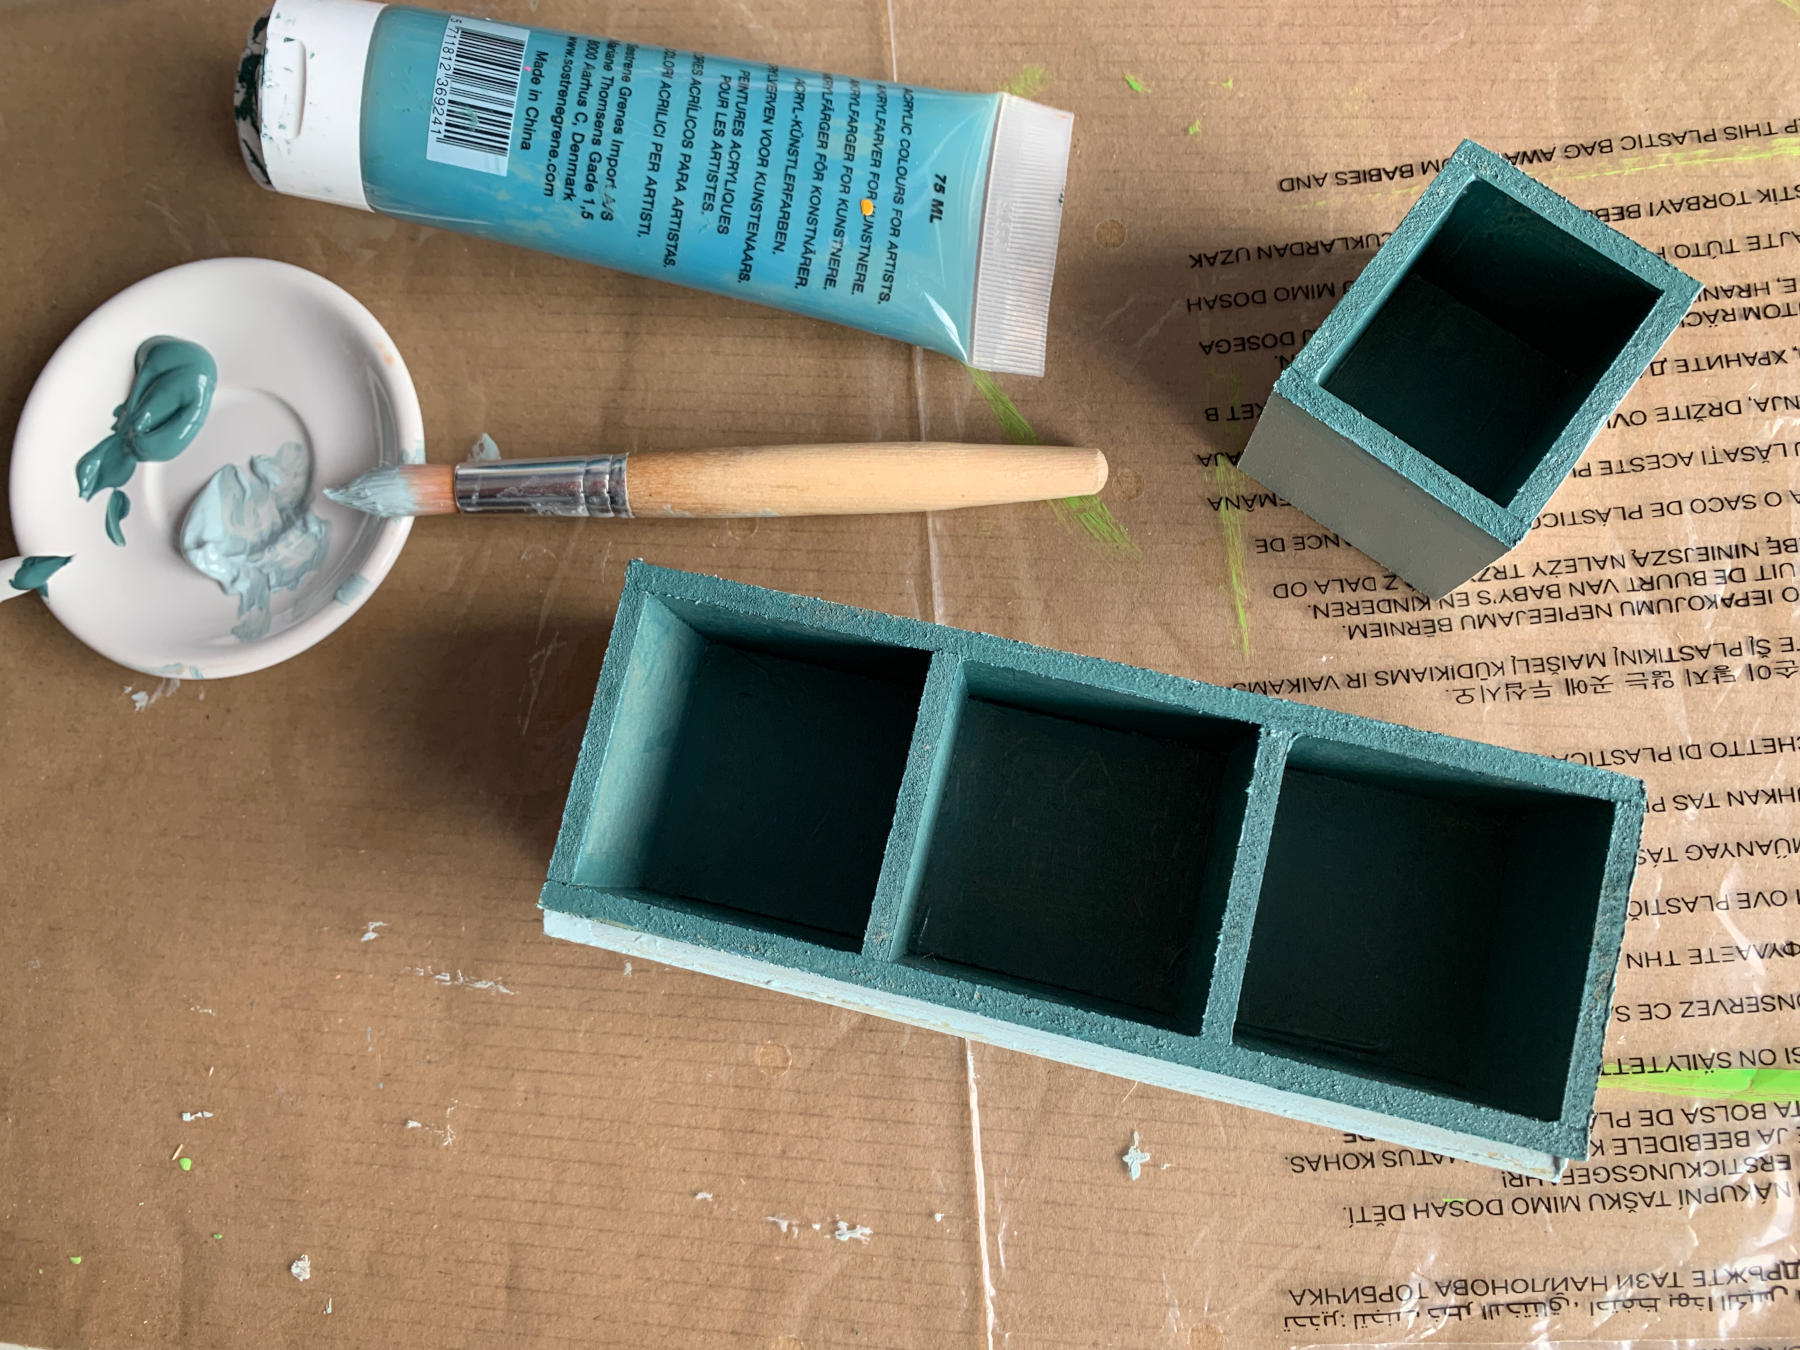
Paint the kitchen unit all around with acryllic paint.
Paint the inside in a second colour.
Paint the top cupboard in the same colours.
Allow the paint to dry completely in an hour

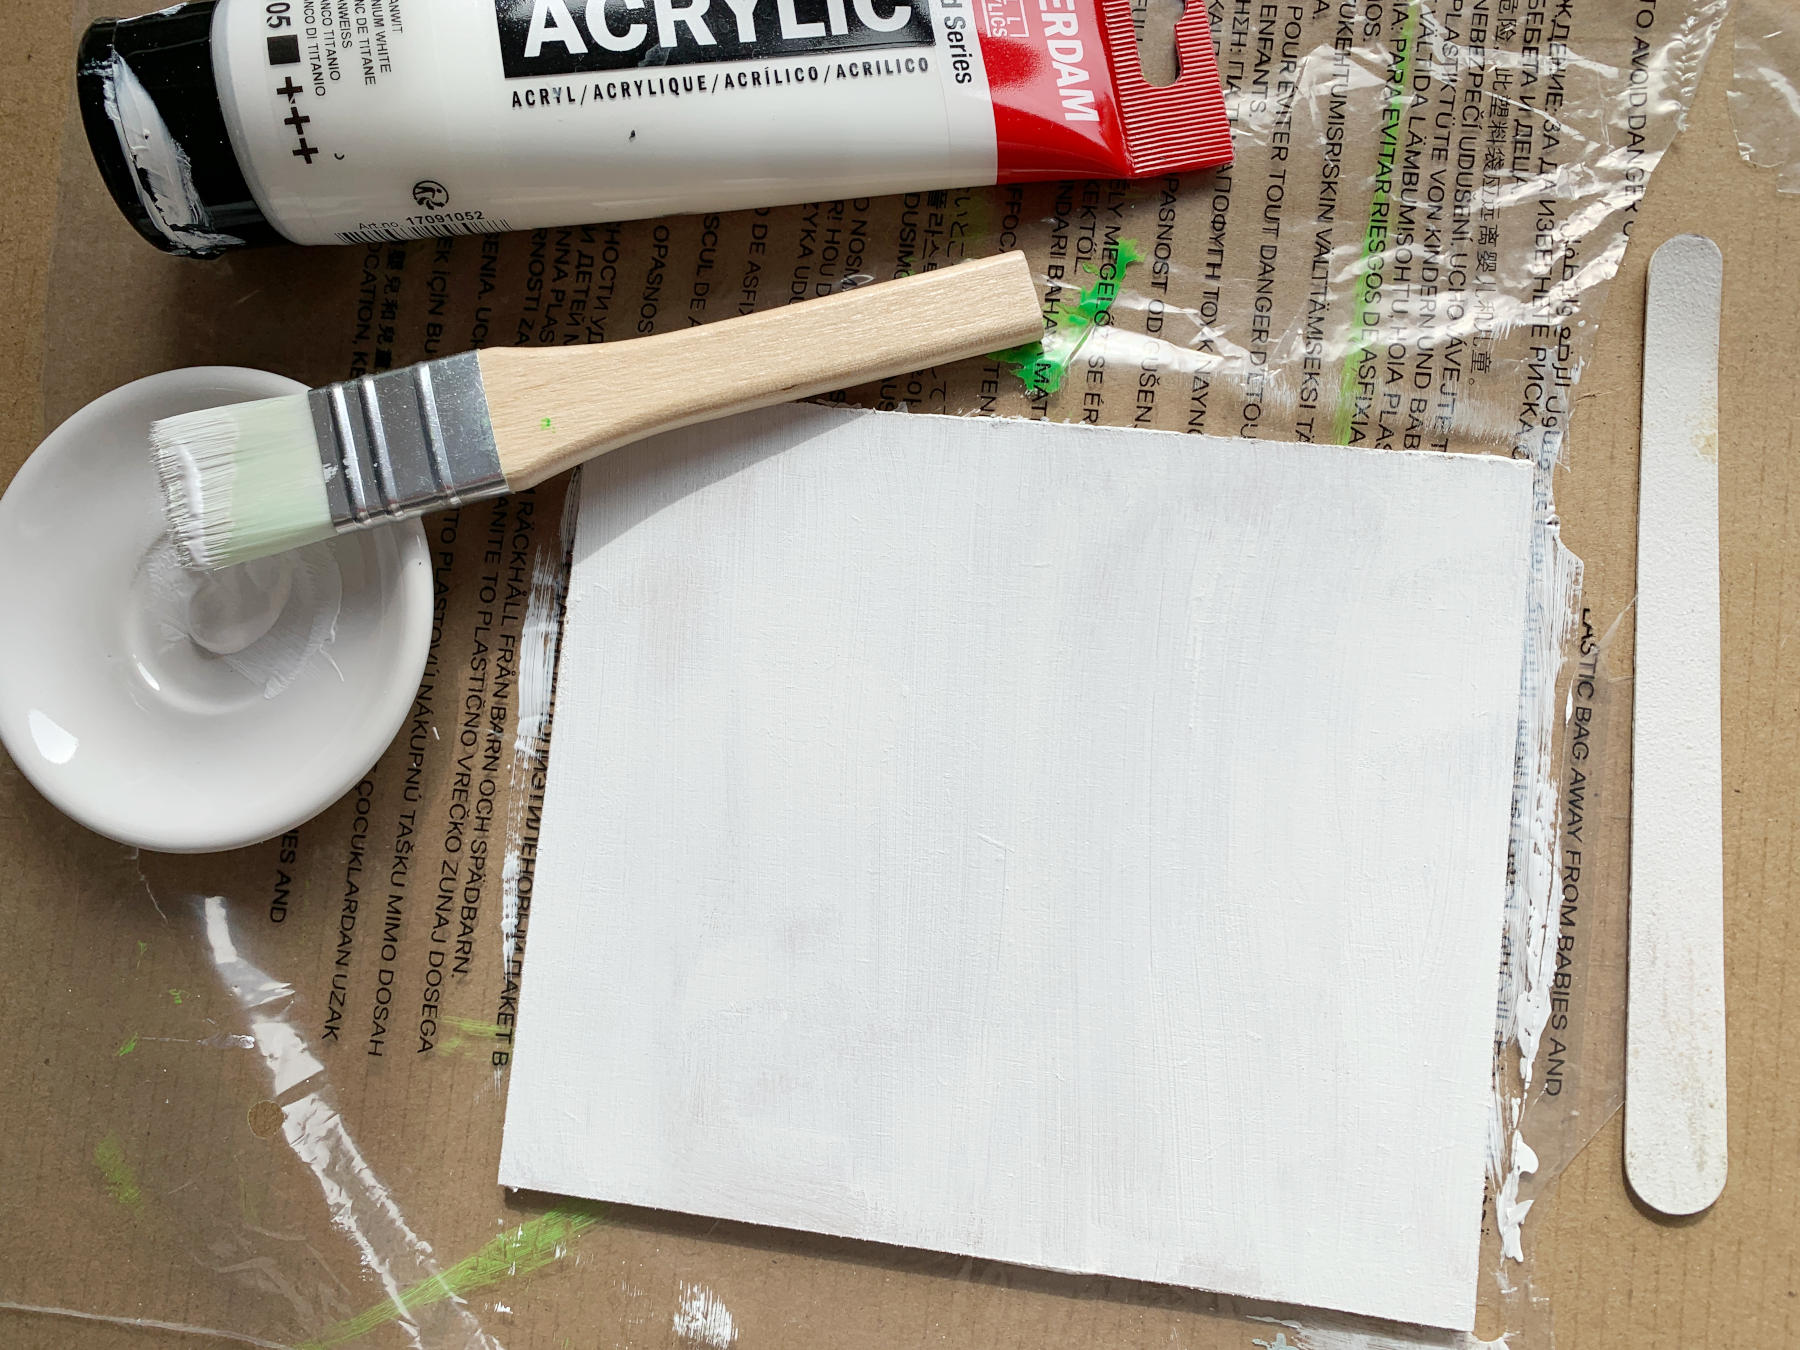
Saw a back wall the size the kitchen unit.
Paint it in a matching colour, we choose white.
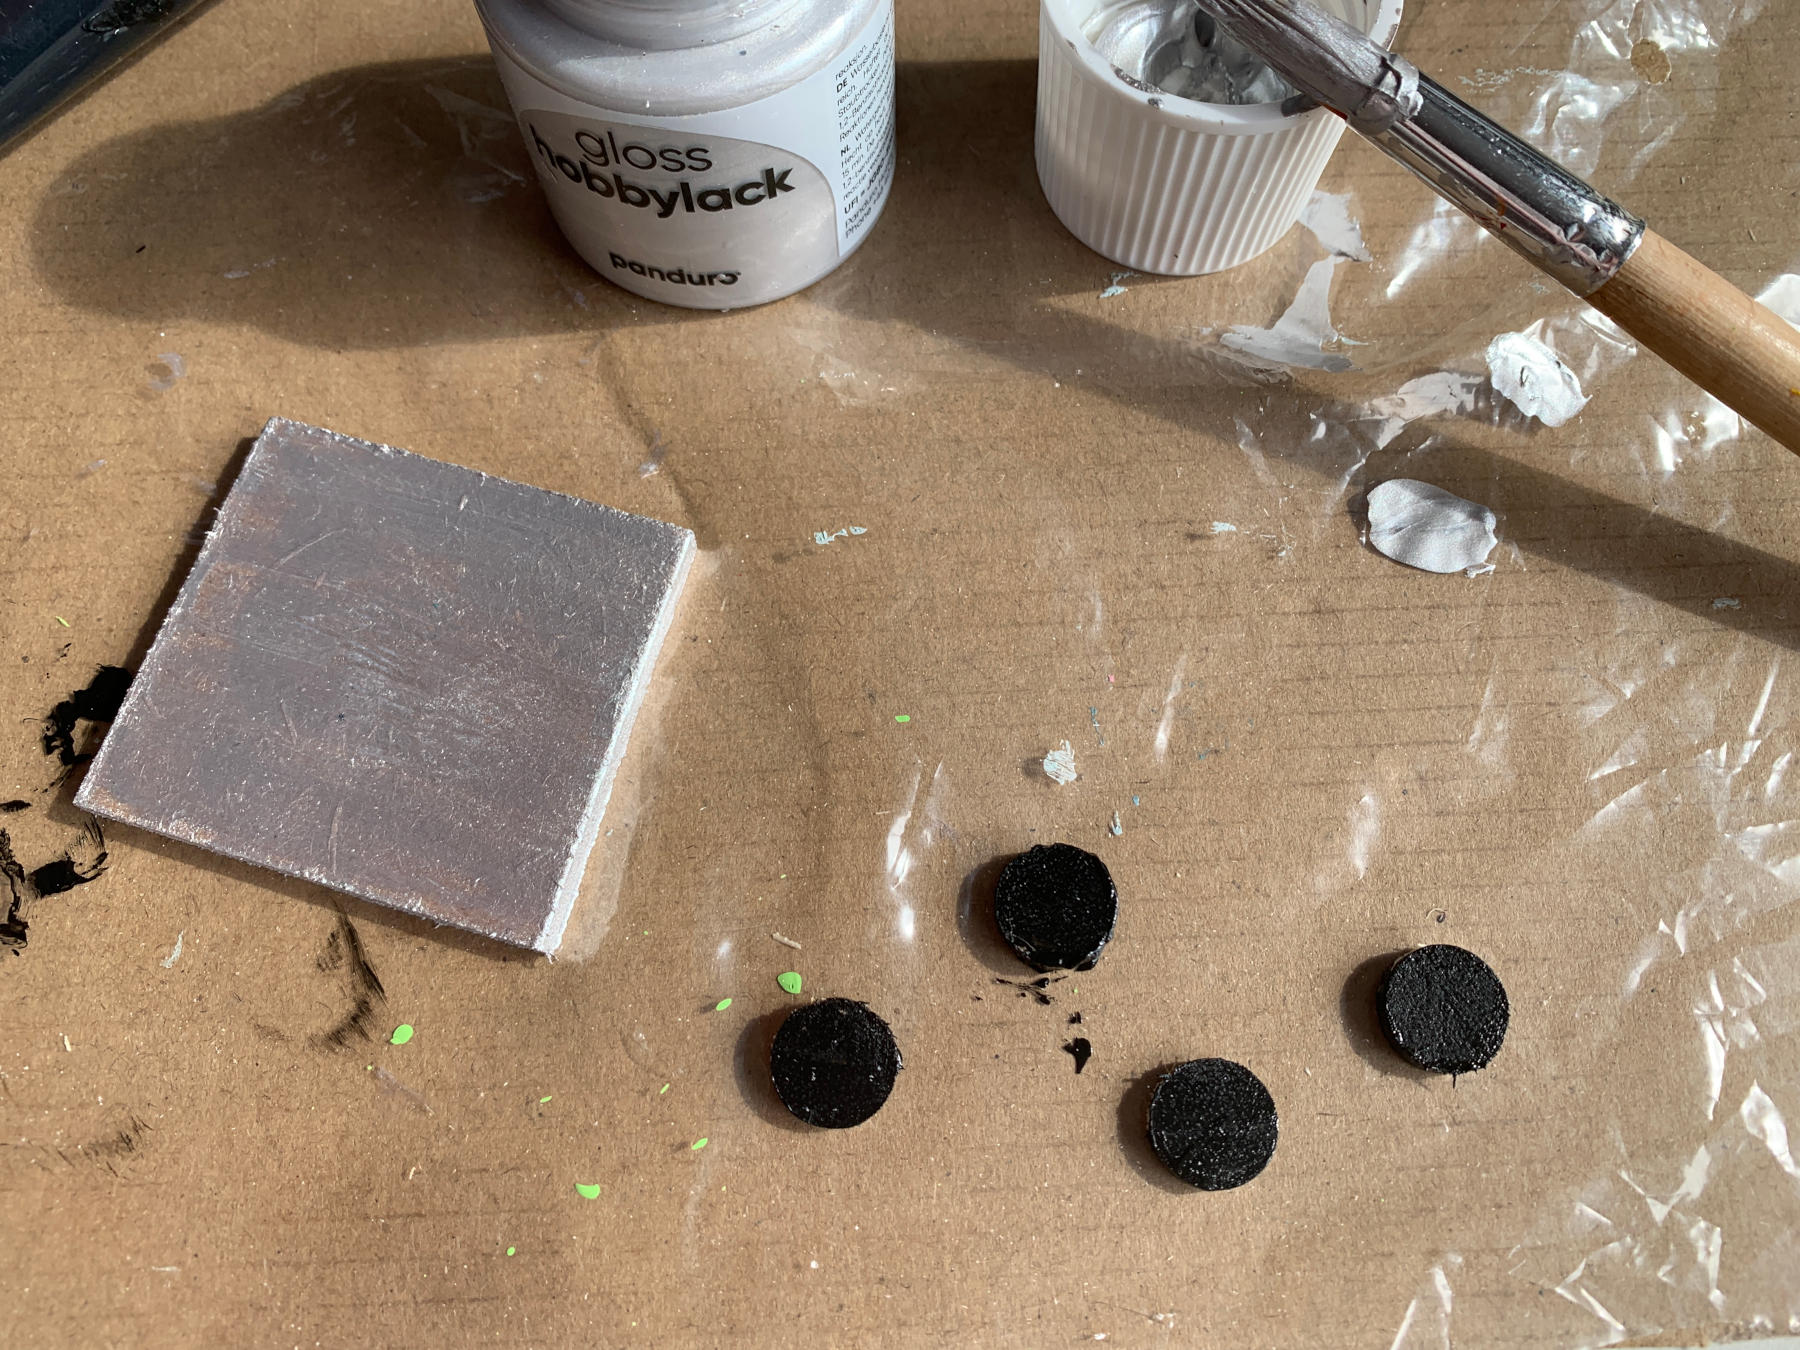
Paint a 'gas stove' silver and stick it on the kitchen unit.
Saw thin slices off a stick and paint them black, stick the 'burners' on the stove
Tip! If you don't glue the kitchen unit to the house, you can always move it.
Stick the kitchen unit onto the back wall and hang the cupboard.
The Bunnies are very happy with their new kitchen, their little house gets cozier all the time!