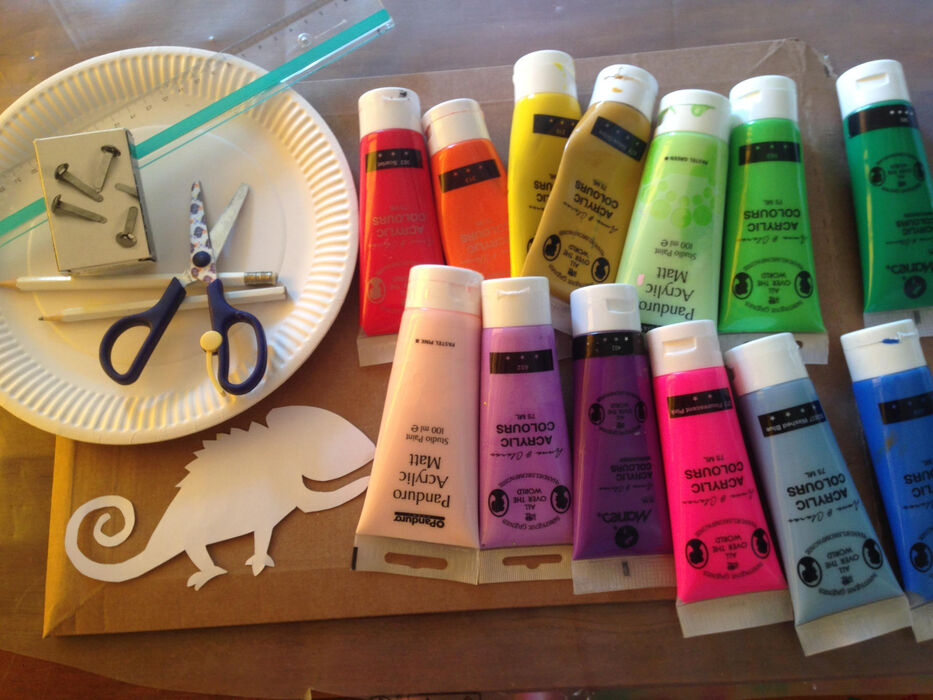
What do you need?
A pattern (this was our inspiration!)
3 paper plates
A piece of white cardboard
Scissors
A pencil
A ruler
Cutting mat and exacto knife
A variety of paint colours
Paint brushes
A large needle and a split pin
Photo: De Aarde, Breda >>>
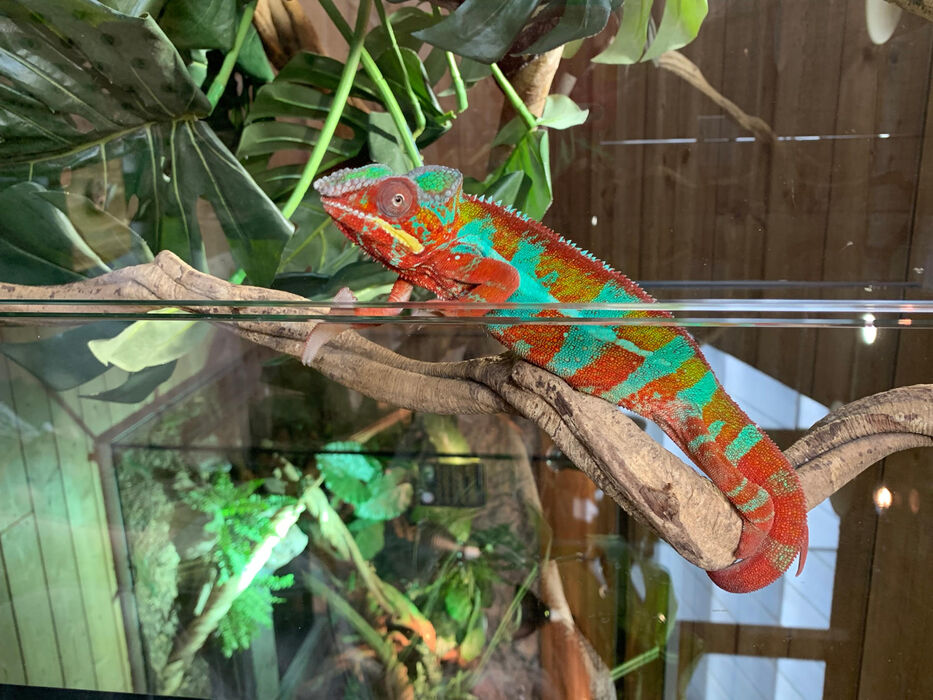
A visit to Reptile House De Aarde (The Earth) in Breda is always a treat for our mini-monsters. They're very interested in reptiles. The Komodo dragon has been a a long time favorite of the monsters. We regularly visit this very dangerous predator at Blijdorp Zoo in Rotterdam. But De Aarde specializes in reptiles, and our monsters absolutely love it!
You can hold a snake there, or if that's a step too far, pet it. You may colour a fun colouring page and feed the little water turtles. But the main attraction here is (of course!) the Komodo and in 2nd place the chameleon, and thats what we craft today: a chameleon. We printed out a Google chameleon, turned its tail upside down, and changed its back and legs. :))
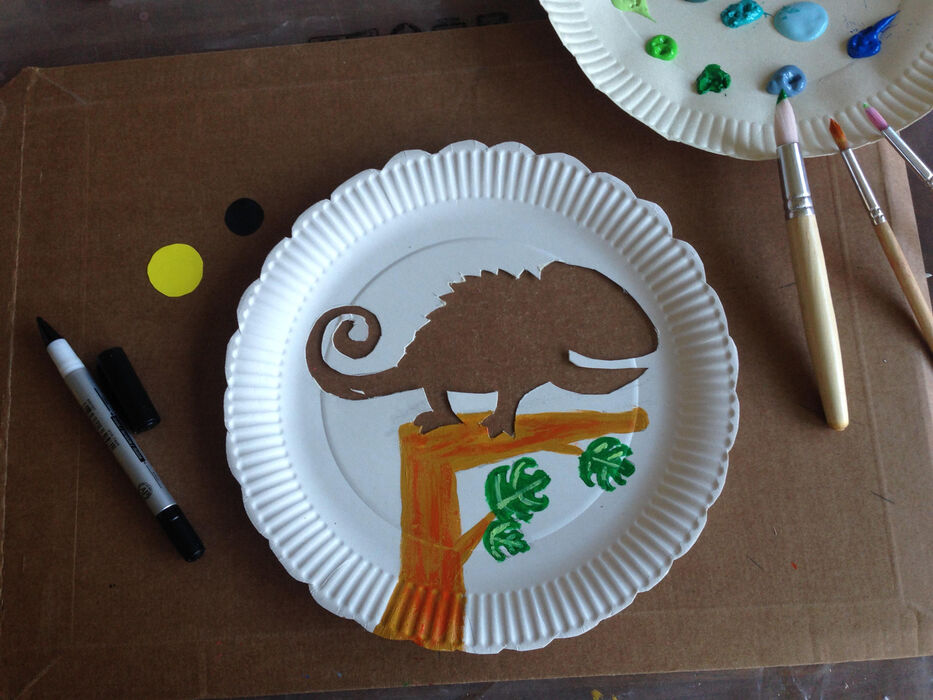
How to make a chameleon
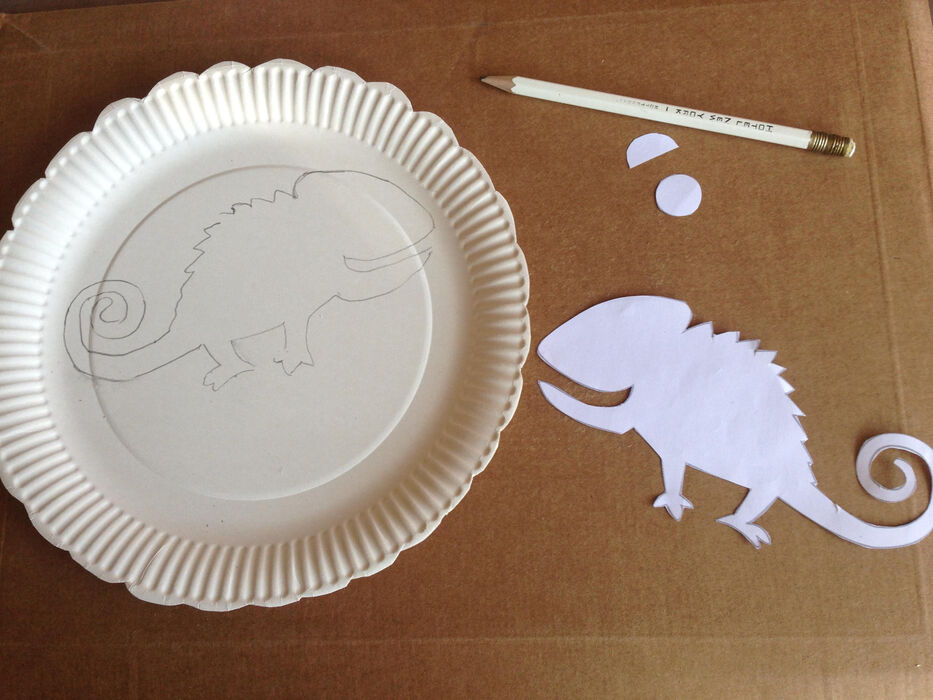
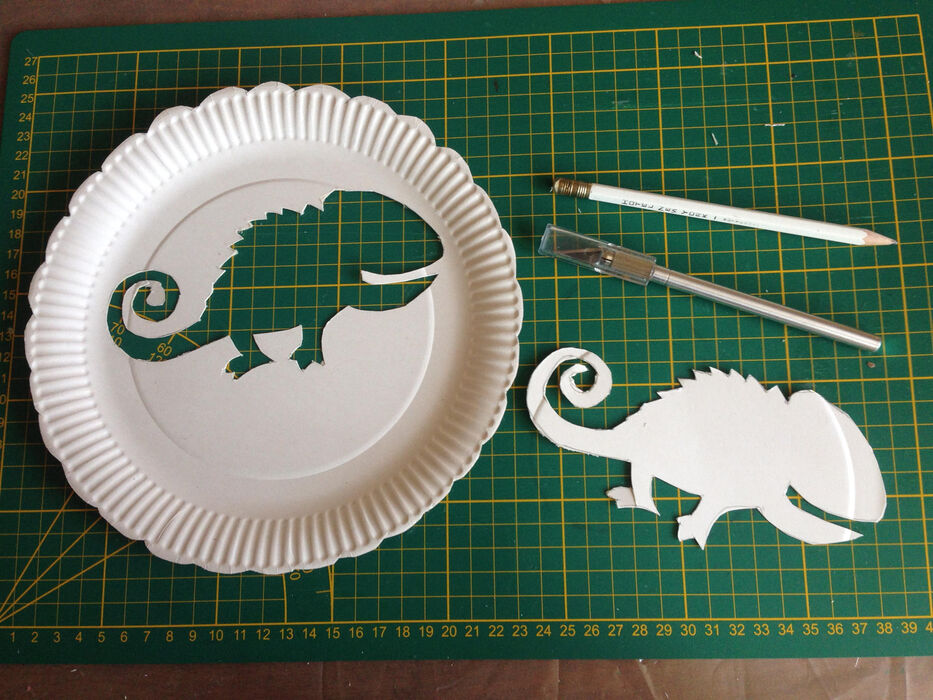
Find a fun chameleon on Google, print and cut it out.
Trace the chameleon on the plate and cut it out.
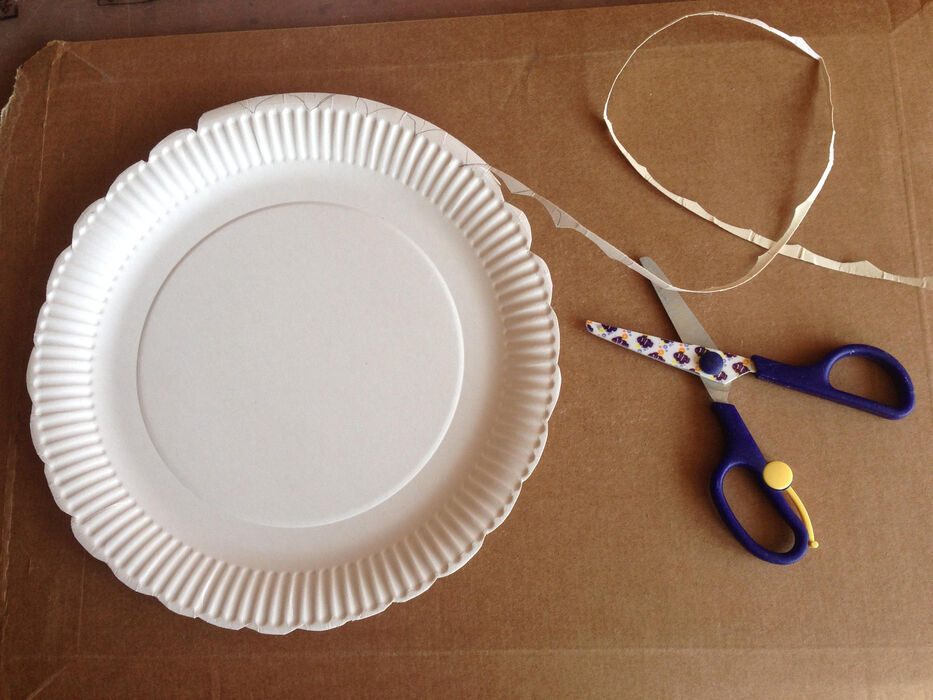
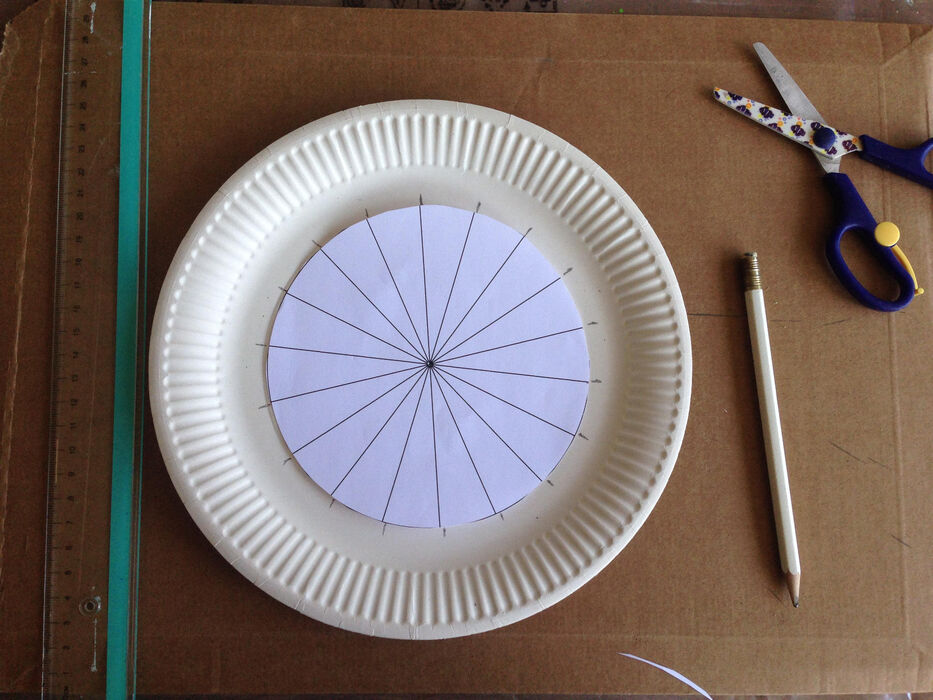
Trace a saucer on white cardboard and cut out the circle.
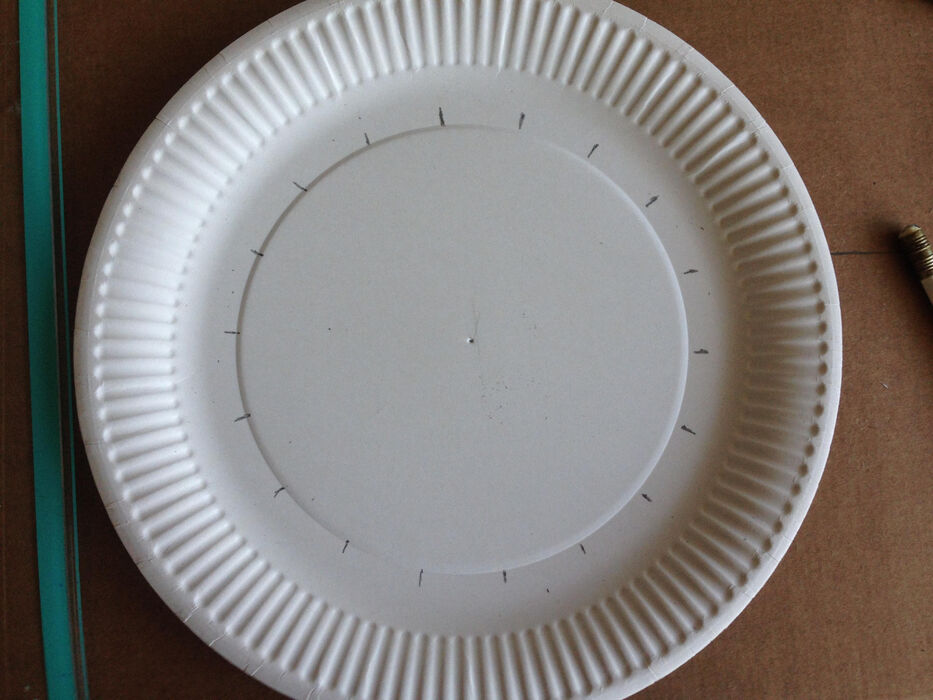
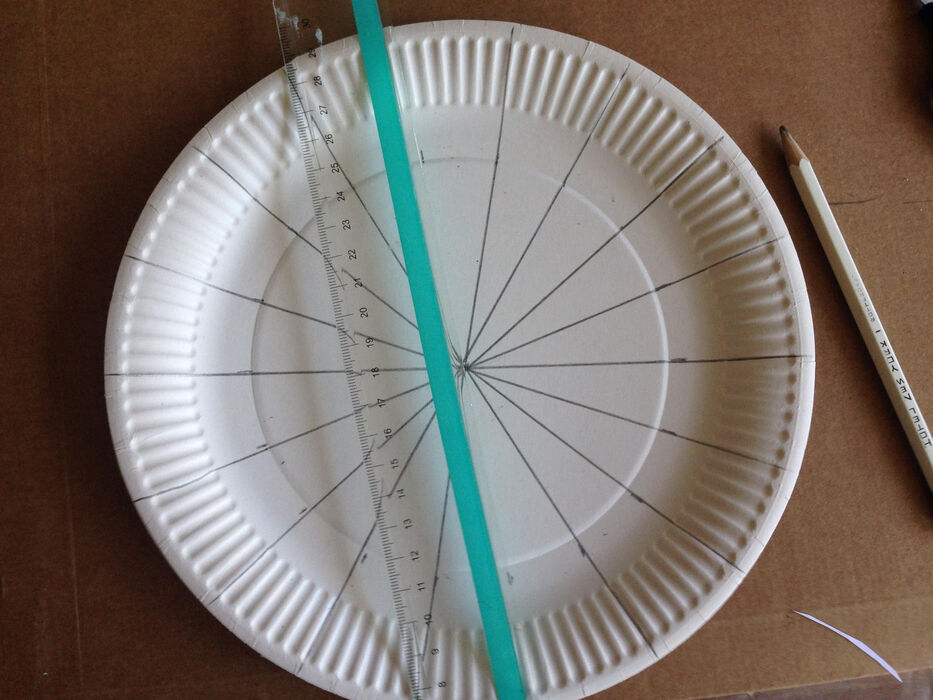
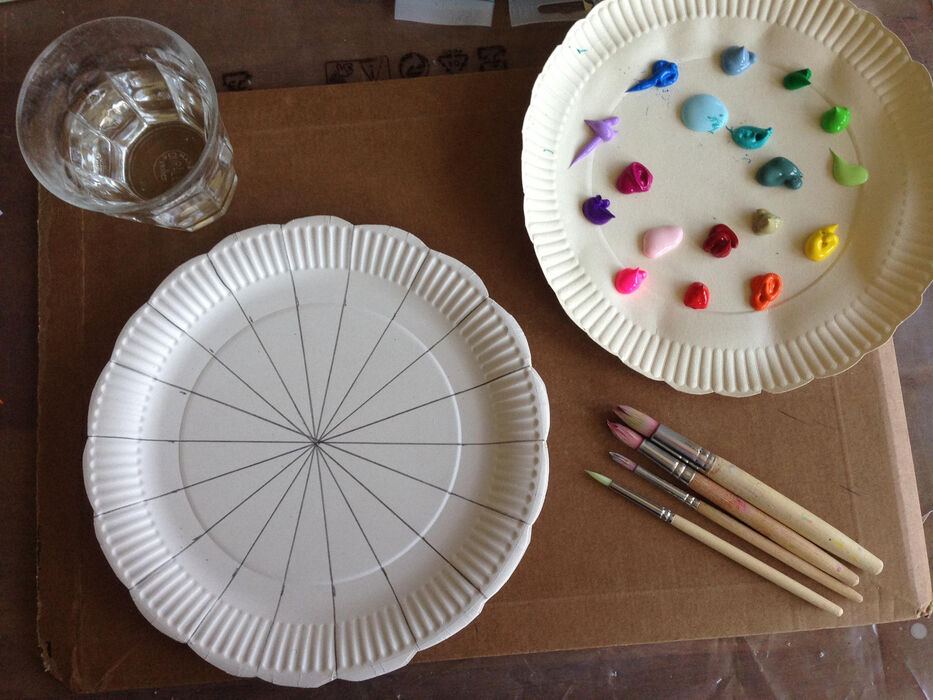
Mark your plate at varying distances, narrow and wider.
Draw long triangles, with the help of your marks and the ruler.
Squeeze little dots of paint on your extra paper plate.
Now you can paint the bottom plate in all kinds of beautiful colours according to your own idea

Allow the paint to dry completely!
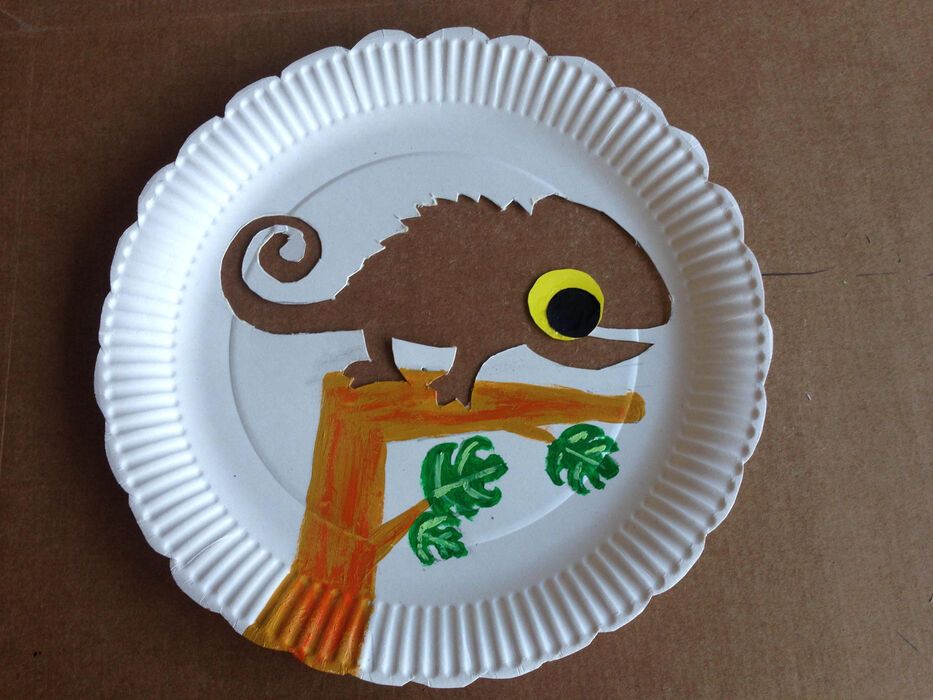
Draw a tree on the cut-out plate,
Paint the chameleons eye and stick it on
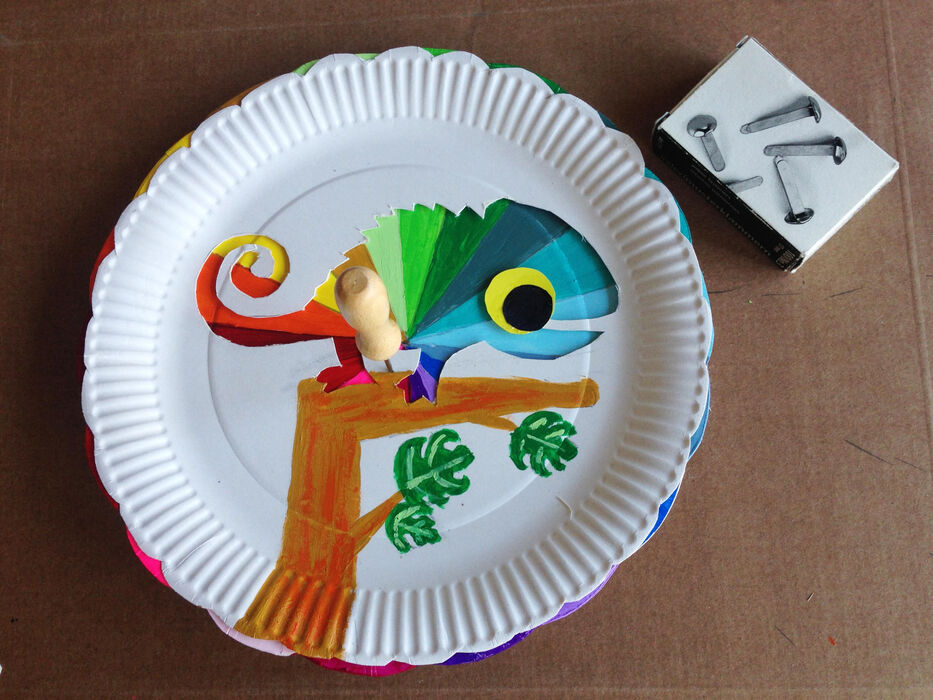
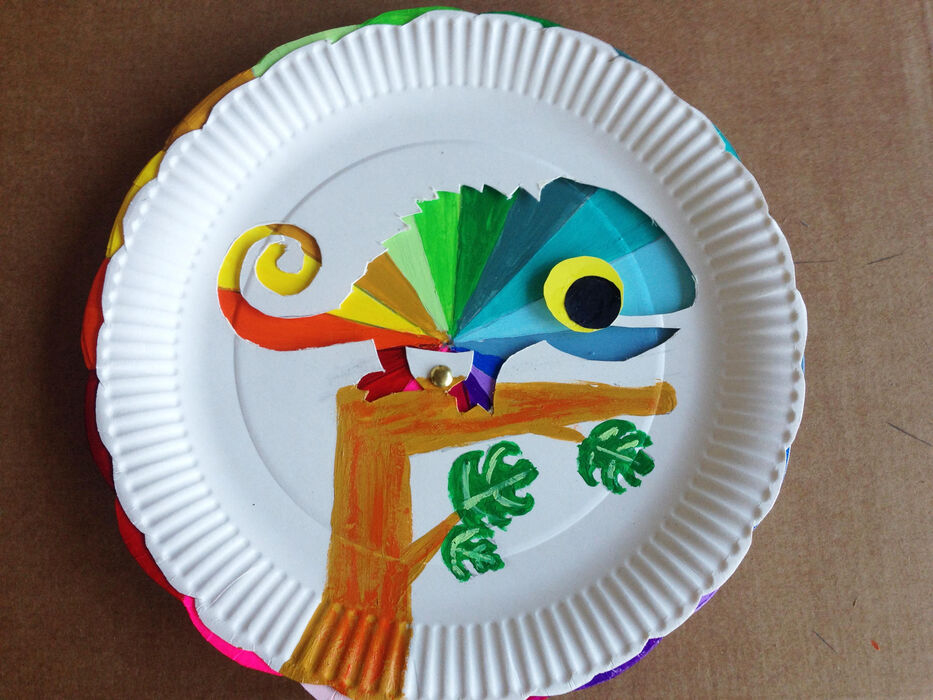
Place the two plates on top of each other and poke a hole through both.
Insert the split pin through the hole, now your chameleon can change its colour.
All you have to do now is turn the bottom paper plate, have fun with your chameleon!